
Kudos

The Tools, Teachers, and Technology That Helped Build Identity

Making an album is never a solo effort. Even when you work alone in your studio, you’re standing on the shoulders of the educators, developers, and engineers who created the tools you use, and the musicians whose work ignited the spark in the first place. I want to thank and acknowledge all of the resources that were essential to Identity.

I’ve divided this into three parts: Inspiration (the musicians who shaped the sound), Education (the people and platforms who taught me), and Tools & Gear (the hardware and software that helped me execute).


Part 1: Inspiration (The Musicians)

Before I dive into the technical tools and educational platforms, I have to acknowledge the musicians whose work lit the fire for this project. Without them, the songs wouldn’t exist.

  • Todd Rundgren – his song “Pretending to Care” was the model for the a cappella piece “Angel”. His approach to voicing, dynamics, and the minor‑verse/major‑chorus shift was a masterclass in emotional songwriting.
  • Aretha Franklin“Amazing Grace” was the spiritual and musical north star for “The Gospel”. Her power, phrasing, and ability to convey raw emotion through a gospel framework set the bar impossibly high.
  • Ry Cooder, Lyle Lovett, and Jedd Hughes – the lonesome, wide‑open Texas guitar feeling I wanted for “Fields” came directly from listening to them. Their use of space, reverb, and tremolo shaped the entire sound of that piece.
  • James Jamerson and Joe Dart – Jamerson’s Motown bass lines and Joe Dart’s relentless groove on Vulfpeck’s “Dean Town” were the foundation for the through‑composed bass approach on “Freedom”.
  • Robert Fripp – his Frippertronics technique and ambient guitar work (especially his recording of “Holy Night”) were the direct inspiration for the texture‑looping A section of “X‑9 / Inner Signals”.
  • Nine Inch Nails (Trent Reznor) and David Bowie – the collaboration on “I’m Afraid of Americans” was the sonic blueprint for “Disintegration”. The aggressive synths, the industrial textures, and the raw vocal delivery all came from studying that track.
  • Radiohead and Soundgarden – the driving rock energy and soaring melodies of both bands were the starting point for “Vantage” before it grew into an orchestral piece.
  • Peter Gabriel (New Blood Orchestra) – his orchestral reimaginings of “Signal to Noise” and “Rhythm of the Heat” showed me how rock energy could be translated into a symphonic context.
  • Ligeti and Penderecki – their aleatoric and textural compositions influenced the more experimental, atmospheric moments in the orchestral writing.
  • Jameson Nathan Jones and Jaron Lopez – while also educators, their original compositions and techniques were a constant source of inspiration for how to make synthesized music feel musical and alive.

Studying these artists wasn’t just about copying their techniques – it was about understanding why their music moved me, and then finding my own way to translate that feeling into my own voice.


Part 2: Education (The Knowledge)

Groove3
I’ve been a Groove3 subscriber for years. For Identity, I relied on their courses for specific tools I needed to learn quickly. Some of the key courses I took were:

  • Omnisphere 3
  • Samplers in Logic
  • BATTERY 4 Explained
  • Superior Drummer 3 Explained
  • Session Horns Pro – this one was essential for getting the horns right on “Freedom”.
  • Melodyne 5 Explained
  • Melodyne 5 Tips & Tricks
  • Arranging Chords for Strings Explained
  • Mastering with Native Instruments Explained

Open Studio
Open Studio was my go‑to for gospel and jazz harmony. I took their courses on jazz piano, gospel playing, and Hammond B3 – all of which directly informed “The Gospel” and “Freedom”. The “Sunday scale” concept is now permanently in my vocabulary.

Produce Like a Pro
Warren Huart’s channel and platform are a constant source of inspiration. The practical mixing advice, the gear talk, and the no‑nonsense attitude kept me grounded during the long mixing sessions.

Thinkspace
The BBCSO course was indispensable for going deeper in working with Spitfire’s orchestral libraries. It definitely helped me to tackle the large‑scale orchestral production on “Vantage”.

ASA (Academy of Scoring Arts)
The ASA community and resources have been a constant source of support and education. Their focus on the craft of scoring – both the creative and business sides – has been invaluable.

Tim Davies (Debreved)
Tim’s blog is a goldmine for orchestration. His approach to spreading out arpeggios across woodwinds and strings was the key that unlocked the arrangement for “Vantage”. I also found his articles on string and woodwind arranging, dynamic relationships, and percussion notation incredibly helpful.

Jameson Nathan Jones & Jaron Lopez
Both of these composer/educators have been inspiring in their approaches to composition and synthesis. Their YouTube content helped me think about texture, voice‑leading, chord voicing and chord progressions in more interesting and nuanced ways.

DeepSeek
This was a surprise. DeepSeek was my AI assistant throughout the mixing and mastering phases. I used it to generate detailed tables for tape machine settings, console emulations, summing choices, and reverb/delay recommendations for each instrument group. It was like having a virtual mentor who never got tired of my questions.

Berklee Online & Chigiana
I have to thank these two institutions for giving me the compositional foundation I needed. Berklee taught me the theory and structure, and the Chigiana Film Scoring Intensive in Siena showed me what is possible when you apply that knowledge to a live orchestra.

Omni Publishing
Their music score books have been a valuable reference throughout this project and continue to be a resource I return to regularly.


Part 3: Tools & Gear (The Workhorses)

DAWs & Notation

  • Logic Pro – my main writing and recording DAW. It’s stable, deep, and the MIDI capabilities are excellent.
  • Luna – my mixing DAW for the Identity album. The tape extensions (Studer A800, ATR‑102) and summing (API/Neve) are incredible.
  • Dorico 6 – the best notation software I’ve ever used. It’s intuitive, powerful, and the proofreading features saved me countless times.
  • Melodyne – far superior to FlexPitch for detailed pitch and sibilance correction. The sibilant tool is a lifesaver.

Libraries & Virtual Instruments

  • Omnisphere 3 – the synth that does everything. Used on multiple tracks for pads, textures, and leads. “Disintegration” alone has 28 tracks of Omnisphere (alongside 5 tracks of UA Anthem).
  • UA Anthem – a fantastic synth for aggressive, modern sounds. Used on “Disintegration”.
  • Spitfire Audio (BBCSO & ARO) – the backbone of the orchestral sound on “Vantage”.
  • Superior Drummer 3 – the most realistic drum library I’ve used. The “Ludwig Classic”, “Nashville Slam” and “Stonewood” kits were workhorses.
  • Guitar Rig – for when I needed quick amp simulations without re‑amping.

Plugins (UA, Brainworx, & Spitfire)

Hardware

  • Mac Studio (“Ted”) – handled the massive 147‑track session with grace (most of the time).
  • Apogee Quartet – the interface that handled all the DI and re‑amping duties.
  • Manley VOXBOX – the single most important piece of outboard gear. The hardware insert on vocals was a game‑changer. (I also have the UAD plugin version, but the hardware is something else entirely.)
  • Radial JCR Re‑Amper – a passive re‑amping device that allowed me to take pre‑recorded DI tracks and send them back through guitar amps and pedal chains, re‑recording them with new tones and textures.
  • Radial BigShot ABY – a true‑bypass ABY switcher that let me route my guitar signal to two amplifiers simultaneously, or switch between them.
  • UA Max – a stereo preamp and dual compressor pedal with three classic compressor models and a UA 610 tube preamp emulation. It was the front end of my re‑amping chain.
  • Arturia Keylab 61 – my main MIDI controller.

Amps & Guitars

  • Fender Tone Master & Fender Hot Rod Deluxe ML – the two amps used for re‑amping “Fields”.
  • “The Duke” (Fender Jazzmaster) – my main electric guitar.
  • “Zeus” (Taylor) – my go‑to acoustic.
  • Yamaha FG730S – the workhorse acoustic.
  • Ibanez SR‑400 – the bass that handled everything from Motown funk to NIN‑style aggression.

Thank You

Finally, I want to thank my wife, Rachel. Our daily “walkie‑talkies” were invaluable for getting my thoughts straight and receiving her thoughtful, ever‑insightful feedback. Our weekly CST (Cafe Show & Tell) sessions were hugely important in helping me see where things were at with the project. And our weekly check‑ins provided accountability and planning. Her honest feedback, her willingness to listen to the same song over and over, and her belief in the project kept me going when I was ready to quit.


Identity is now available on all streaming platforms (such as Spotify), or you can also listen to it on Bandcamp.
MUSIC PROJECT PHASES SUMMARY

My Music Project Development Framework – From Idea to Release

Over the course of making the Identity album, I developed a workflow that I now consider my default for any large-scale music project. It’s divided into six phases: Writing, Pre-Production, Production, Post-Production, Mastering, and Delivery. These aren’t rigid boxes (they overlap and blur) but having a mental map of where I am in the process helps me stay focused and organized.

What matters more than the steps themselves is the mindset behind them. Two principles guided everything I did:

  1. Start with the end in mind. Before I wrote a single note, I defined what the project was, what it was about, and where it was going. This is the “abstraction”. I returned to this process whenever I wasn’t clear on what to do next. It kept me from drifting and stalling out.
  2. Feel as if it is already done. This is the creative equivalent of visualization. I worked from the assumption that the album was complete and perfect, and I was simply discovering it. This shifted my energy from “trying” to “receiving”.

With that in mind, here is how the project unfolded.


Phase 1: Writing (The Creative Birth)

This is where the seed is planted. Before any technical decisions are made, I focus entirely on the creative vision – the musical and lyrical content of the album.

Key activities:

  • Album‑level abstraction – defining the emotional arc, the “sound world” (in terms of feelings, not gear), the track order, and the intended journey for the listener.
  • Listening parties and research – curating reference tracks and deeply analysing artists I admire (Todd Rundgren, Aretha Franklin, Robert Fripp, Lyle Lovett, NIN, etc.) to understand what made their music connect.
  • Song abstractions – for each song, answering four questions: What is this? What does it do? What is it about? Where does it go?
  • Whiteboard sessions – generating adjectives and mapping emotional arcs before writing a single lyric or chord progression.
  • Melody, chord progression, and lyric writing – using songwriting rotations, free‑writing, and random prompts (Storymatic cards) to generate material.
  • Lead sheets and piano reductions – distilling the song down to its essential elements before moving to full arrangements.
  • Parallel processing – working on all songs in rotation, not one at a time. This prevented me from getting stuck on a single piece and kept the album feeling cohesive.

Why it matters: This is where you answer the big questions. If you do this well, the rest of the process is a matter of execution. The abstractions and emotional arcs are the compass that guides everything that follows.


Phase 2: Pre‑Production (The Blueprint)

Once the songs exist, the next step is to prepare them for the studio. This is the technical preparation phase – taking the creative ideas and turning them into a workable plan.

Key activities:

  • Full notation and scores – using Dorico to create full scores for orchestral pieces, and lead sheets for simpler songs.
  • Instrumentation and sound palette – deciding which instruments, libraries, and outboard gear will be used for each track (feelings are now translated into specific tools).
  • DAW template setup – creating Logic or Luna files for each song with tempo, meter, key signatures, markers, and chord tracks already in place.
  • Hardware prep – restringing guitars, testing hardware inserts (like the Manley Voxbox), and setting up re‑amping chains.
  • Rehearsal – daily rehearsals of all songs in rotation, always with a metronome (a lesson learned the hard way), and recording every session for later reference.
  • CST (Cafe Show & Tell) – weekly listening/performance sessions with Bon (my wife) to get honest feedback and uncover blind spots.

Why it matters: Pre‑production is where the blueprint becomes concrete. If you do this well, the rest of the process is a matter of execution. If you skip this, you spend the rest of the project making guesses.


Phase 3: Production (The Execution)

This is where the recording happens – both the “real” instruments and the virtual ones. It’s also where a lot of the heavy lifting happens in terms of editing and sound design.

Key activities:

  • Recording – capturing live instruments (guitars, bass, vocals) using multi‑mic techniques, DI recording for re‑amping, and careful gain‑staging.
  • MIDI programming – drums (Superior Drummer), synths (Omnisphere, UA Anthem), and orchestral samples (Spitfire BBCSO and ARO).
  • Vocal production chain – a consistent workflow that became essential: clip gain to -18dB RMS → Melodyne (pitch & sibilance) → Hardware Manley Voxbox → parallel compression → bus processing (Shadow Hills, Pultec).
  • Re‑amping – recording DI signals, then running them back out through real amps and pedals (e.g., re‑amping “Fields” through the Tone Master and Landau amps, or through the Strymon BigSky for shimmer).
  • SHORTS/LONGS workflow – for orchestral samples, blending long articulations with short ones for more realistic performances, applying delay offsets, and rendering virtual instruments to audio to save CPU.
  • Session management – keeping safety MIDI tracks, SMPTE‑locking regions, and making safety duplicates of keeper takes.

Why it matters: Production is where the blueprint becomes sound. The key is to work efficiently and not let technical problems derail the creative flow. I learned that it’s always better to record DI and re‑amp later, and that practicing in the actual recording setup makes a huge difference (to me and my neighbors).


Phase 4: Post‑Production (Mixing)

Mixing is where the individual tracks become a cohesive whole. I did all of my mixing in Luna, using UAD, Brainworx, and Spitfire Audio plugins.

Key activities:

  • Gain‑staging – ensuring every track hit the processors at the right level (clip gain to -18dB RMS).
  • Submasters and groups – creating submasters for each instrument family (drums, bass, guitars, synths, vocals) and writing automation on those submasters to build dynamics.
  • Tape and console – using Studer A800 and ATR‑102 on individual tracks and subgroups, and matching console emulations (SSL, Neve, API) to each instrument group.
  • The Mix Processing Bus – this was a critical innovation. I ran all submasters into a dedicated processing bus (with all my mix bus plugins), then into a trim bus to bring the level down to -6dBFS for mastering. This decoupled the tone from the delivery level, so I could drive the plugins hard while still delivering a clean, headroom‑rich mix.
  • Parallel processing – using parallel compression and distortion on drums, vocals, and acoustic guitars (Fairchild 660, Distressor, LA‑3A).
  • Reverb and delay – using a consistent palette across the album (Lexicon 480L, Capitol Chambers, Air Studios Reverb Essentials, EP‑34, Cooper Time Cube).

Why it matters: Mixing is where the emotion of the performance meets the clarity of the production. The Mix Processing Bus was a game‑changer – it gave me the best of both worlds: the sound I wanted and the headroom the mastering sessions needed.


Phase 5: Mastering (The Final Polish)

Mastering is the bridge between the mix and the final release. My goal was to give the album a cohesive sound while preserving the dynamic arc I had built.

Key activities:

  • Defining LUFS targets – I wanted the album to build in volume and intensity as it went on, so I created specific LUFS values for each track, based on its genre and position in the album.
  • Plan A / Plan B – I had two mastering plans for this project: a full Ozone chain (tape, EQ, imager, compressor, maximizer) and a simplified version (only Adaptive Limiter). The simplified version served as a safety net and reference.
  • Genre‑specific settings – applying different Ozone presets and chains for each track (a cappella, acoustic, gospel, funk, etc.).
  • True peak limiting – using a true peak limiter (bx_limiter) to catch any intersample peaks.
  • Dithering – applying POW‑r #2 dithering when converting from 24‑bit to 16‑bit.

Why it matters: Mastering is the final quality control. It’s where you ensure the album sounds consistent, translates well across systems, and has the right loudness for its intended delivery.


Phase 6: Delivery (The Finish Line)

This is the final step – getting the album out into the world.

Key activities:

  • Trimming – cutting silence from the tops and tails of all tracks.
  • Format conversion – creating multiple delivery formats: 24/96 (archive), 24/44.1 (high‑res), and 16/44.1 (CD/streaming).
  • Dithering – applying POW‑r #2 dithering when reducing bit depth.
  • Listening parties – holding final listening parties with Rachel to confirm the album worked as a whole.
  • Metadata – preparing track titles, artist name, album art, and ISRC codes.
  • Submission – uploading to CDBaby for distribution to streaming platforms.

Why it matters: Delivery is where the project leaves your hands and enters the world. It’s easy to rush this phase, but taking the time to get the formatting, naming, and metadata right ensures the album is presented professionally.


Final ThoughtS

The process is a cycle. I documented every phase thoroughly, and after the album was released, I conducted a full retrospective – writing down what worked, what didn’t, and what to improve next time. That retrospective is now my first step before starting any new project.

Vantage

Radiohead meets Soundgarden, and the song that almost never was

From the outset, I knew that I wanted the Identity album to end with an orchestral piece. But aside from doing abstractions and gathering reference materials, I was actively avoiding working on it. In my mind, it felt way bigger than the rest of the album combined – the scope, the orchestration, the sheer weight of it. It was the one piece I left out of my songwriting rotations because I just didn’t have a clear idea of what it would be. As the months passed, it became a problem that grew larger with every day.

During the songwriting sessions in August 2025, I wrote a complete Radiohead‑meets‑Soundgarden rock song with a full structure of melodies, chords, and lyrics. For a working title, I called it “RadioGarden”.

By December 2025, I had finished production on all of the songs for the album aside from RadioGarden and whatever the orchestral piece would be. I knew from my compositional studies at Berklee and Chigiana that just about any idea can be reimagined for orchestra, so I started asking myself: “What if this rock song was played by an orchestra?” That question changed everything.

“RadioGarden” grew beyond its rock origins. It became a large symphonic piece with a fully notated score and full orchestral instrumentation. It became the album’s finale (now named “Vantage”), and the most difficult piece I’ve worked on in a long time.

When I finally started orchestrating, Tim Davies’ approach – particularly spreading out arpeggios across woodwinds and strings – was the key that unlocked the arrangement. His approach gave me a framework to create movement and interest, rather than simply sustaining chords under the melodies.

Before and after applying ideas from Tim Davies on the first verse:

Before and after applying ideas from Tim Davies on the second verse:

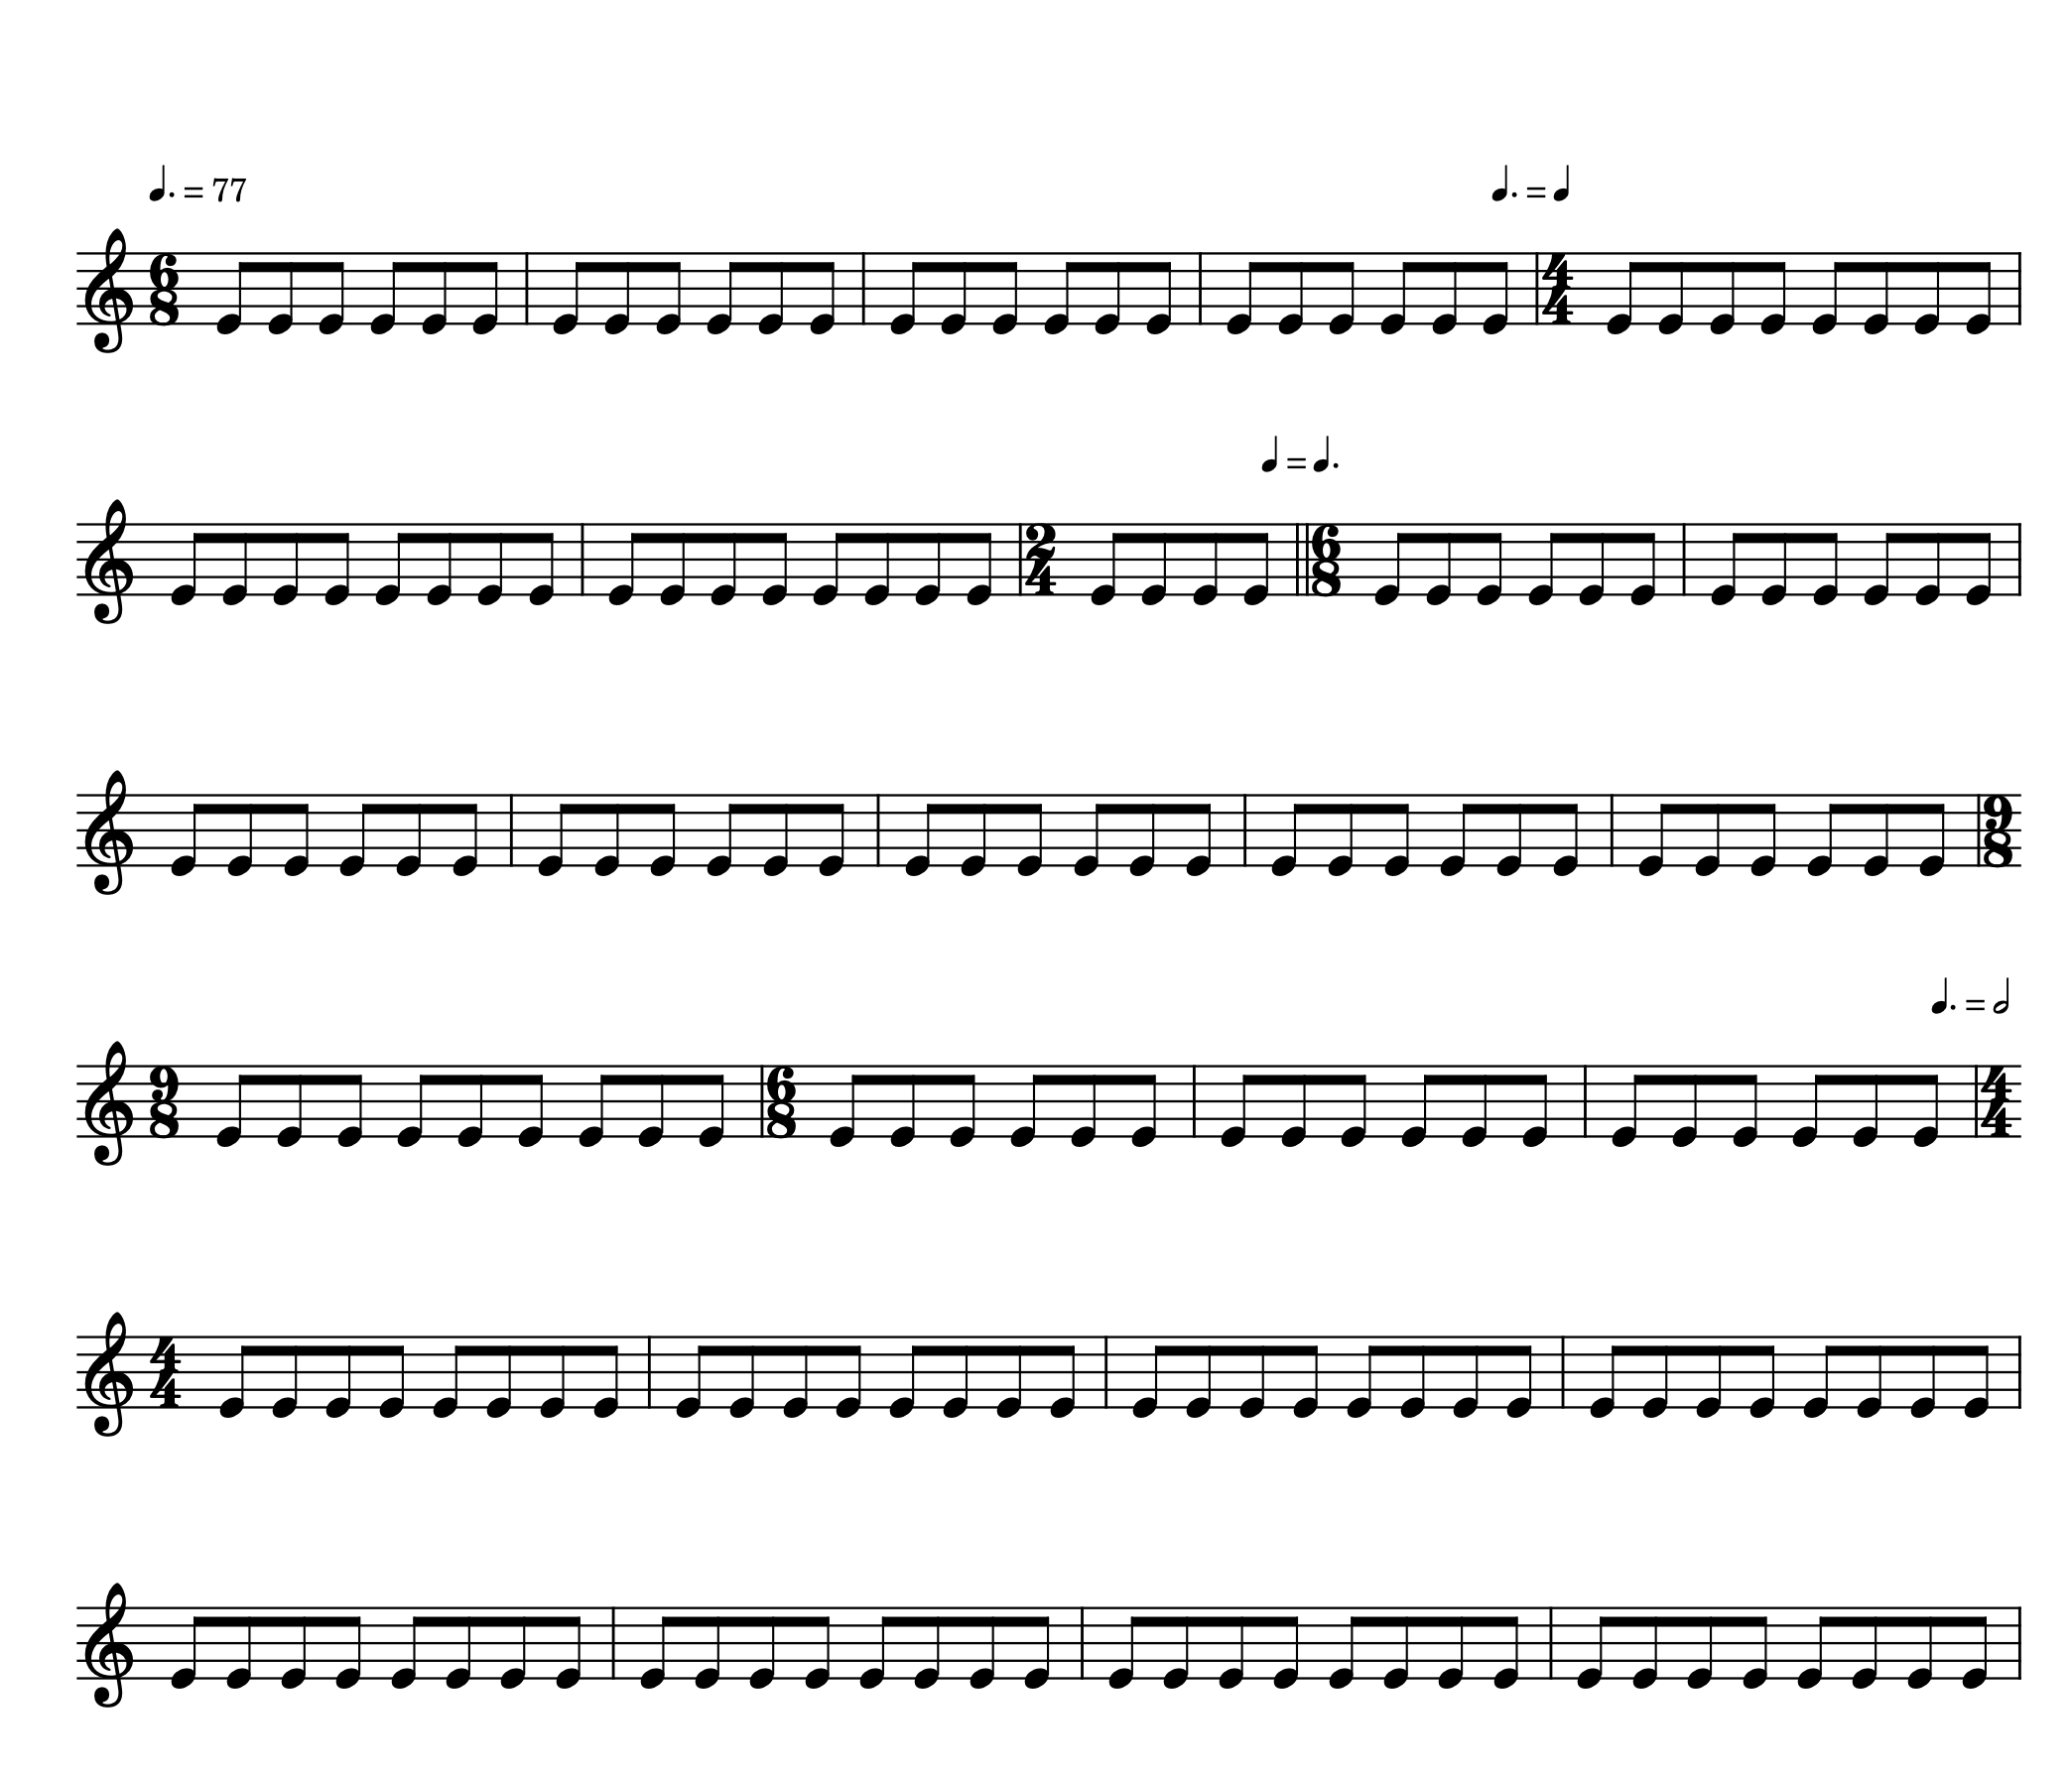
The song was full of challenges: metric modulations, meter changes, sample articulation hell, and technical issues that pushed me and my computer to our limits. There were moments when I thought I would just give up and let it go for the Identity release.

Worksheet I put together to figure out the metric modulation.

My editor at work.

Once the notated score and the orchestral production in Logic were in place, I was so burnt out that I almost called it done. I was beyond ready to move on to post-production (mixing & mastering). But my original vision was that this piece would be the climax, the biggest moment of the entire album. I wanted it to be massive. So I decided to treat the middle section as an experiment, adding rock instrumentation just to see what happened. After putting together some initial ideas, I realized it sounded even better with the power of the drum set, electric guitars, and electric bass giving it depth and breadth. I pushed through and added parts to the middle chorus, bridge, and outro sections. I’m really glad that I did – it elevated the entire piece.

It became the emotional and musical climax of the album – the moment when the protagonist finally finds clarity and resolution. Kind of like me with this song.


Special Recording Notes

  • Orchestral parts: Notated in Dorico, exported as MIDI, brought into Logic.
  • Orchestral libraries: Spitfire BBCSO and ARO.
  • Rock band parts: Electric guitar, bass, drums (Superior Drummer).
  • Recorded in Logic at 24‑bit/96kHz.
  • Recording environment: A huge Logic session in terms of track count and memory footprint. Final file size was ~29GB with 147 tracks. Each orchestral instrument was three tracks blended together: one exported from Dorico/Note Performer, and the other two being long and short articulations of Spitfire Audio’s Abbey Road Orchestra or BBC SO libraries.
  • Keeper take: The acoustic guitar and lead vocal guide track were recorded with one mic, just to hear if the other parts were working. As the project wore on, I found that I liked the scratch track and used Logic’s stem splitter to get each part on individual tracks.

The Logic file for Vantage after rendering all virtual instruments as audio files.


Special Mix Prep Notes

  • Clip gain: Adjusted every vocal region to around -18 dB RMS before any processing.
  • Melodyne: Used for both pitch correction and the sibilant tool.
  • Hardware Voxbox: Ran the lead vocal through my Manley Voxbox as a hardware insert.
  • Rendered all virtual tracks as audio for export to Luna.
  • SHORTS/LONGS workflow: Essential for realistic sample‑based orchestras.

Special Mixing Notes

  • Processing: Used DeepSeek tables for tape, console, summing, reverb, and delay (huge help!). Maxed out Luna’s rendering engine due to track count and processing (this had never happened to me in Luna before).
  • Mix Processing Bus: All submasters → processing bus → trim bus – decouples tone from delivery level.
  • Mix Bus processing: Black Box (“17 Mix Bus 1” preset), SSL G Bus Compressor (modified Default setting), Fairchild 670 (Modified “Stereo Bus” preset), ATR‑102 (“Classic 250 Smooth Master” setting), Pultec EQP-1A (modified Default setting).

Massive mix in Luna, need four screenshots to get all the tracks in view


Special Mastering Notes

  • Target LUFS: -10 LUFS @ peak
  • Ozone settings:
    • Vintage Tape: “Clear Character” preset
    • Equalizer: Slight boost of +0.8 dB @ 11.227 kHz (Shelf)
    • Imager: 0‑100Hz = 0.0, 100Hz‑4kHz = 20.3, 4kHz‑12kHz = 30.0, 12kHz‑20kHz = 43
    • Vintage Compressor: “Smooth Opto” preset – threshold -19.9 dB, ratio 1.5:1, attack 32.7ms, release 50.4ms
    • Maximizer: IRC IV “Modern”, threshold -5.4 dB, ceiling -1.1 dB, Character 2.60
  • Dither: POW‑r #2 when converting from 24‑bit to 16‑bit.

PDF

  • 📄 Here is the full score to Vantage.

Identity is now available on all streaming platforms (such as Spotify), or you can also listen to it on Bandcamp.

X‑9 / Inner Signals

Frippertronics, texture looping, and the search for a new sound

The seventh song on Identity is “X‑9 / Inner Signals”. It started as an experiment in texture looping – a chance to explore the Frippertronics approach that I had heard about but never looked too deeply into. I had listened to an interview with Dave Matthews on his approach to playing guitar, and he mentioned that he had been influenced by Robert Fripp and tried to incorporate some of those ideas into his playing. That reminded me how much I had enjoyed Mr. Fripp’s playing as well, and it got me digging around for inspiration.

The piece is divided into two distinct sections. The A section is ethereal and dreamlike; a wash of texture and atmosphere based on a simple two‑note phrase in C# minor (Aeolian). I built this section using loops on my pedalboard, layering reverb, delay, and modulation to create something expansive and meditative. This is the “Inner Signals” part, and I used Robert Fripp’s recording of “Holy Night” as a basis for its approach.

The B section is hyper‑active, jagged, and angular. It’s also in C# minor, but the feel is completely different – driving, aggressive, and rhythmically complex. For this section, I used three guitar parts (low, middle, and high), each with its own character and processing, with a bass track throughout.

On the album, “X‑9 / Inner Signals” represents a moment of introspection. After the release of “Freedom”, the protagonist turns inward – the textures and loops reflect the complexity of inner thoughts and the search for clarity. The two sections mirror that internal tension: the dreamy search and the jagged, restless questioning.


Special Recording Notes

  • Guitars: Les Paul (low part), Telecaster (high part), Strat (mid part).
  • Bass: Electric bass (recorded DI, with MXR Bass Synth pedal).
  • Pedalboard signal chain: Guitar → Freqout → EP Boost → Volume Pedal → Strymon Timeline → Strymon BigSky → Apogee Quartet.
  • Other effects: All other effects (amp simulators, Brigade Chorus, EP‑34, Logic’s Tremolo) were applied in Logic on a track‑by‑track basis.
  • Live looping: I learned about and experimented with Logic’s Live Loops feature, but opted to create loops on my pedalboard and record those onto separate tracks in Logic. It just felt easier to get what I wanted from the looper pedal.
  • Session size:
    • A section: 7 audio tracks with 3 aux tracks for additional processing.
    • B section: 6 audio tracks with 3 aux tracks for further effect processing.
  • Process note: I had completely figured out all the parts for the B section while having only a vague notion of what I wanted for the A section. It wasn’t until late in the recording of the rest of the album that I came back to work on the A section (the looping part). Fortunately, that turned out to be a relatively quick process. From start to finish the A section only took a few hours.

Special Mixing Notes

  • Processing:
    • A section: Heavy reverb (Air Studios Reverb), delay (EP‑34), and modulation.
    • B section: More aggressive processing – low part used the “Saggy Bridge” preset on UA’s Woodrow 55 amp sim.
    • EP‑34 delay: Modified version of the “Too Big Without You” preset.
    • Logic’s Tremolo: Used on the high part in the B section – 1/4 note rate, depth of 100%, giving a lot of movement and motion.
  • Panning: Wide stereo spread for texture.
  • Mix Bus processing: Black Box (“16 Mix Bus 1” preset), SSL G Bus Compressor (modified Default setting), Fairchild 670 (Modified “Stereo Bus” preset), LA‑3A (“Mix Bus Comp -1dB GR” preset), ATR‑102 (“Classic 250 Smooth Master” setting).

Special Mastering Notes

  • Target LUFS: -16 @ peak
  • Ozone settings:
    • Vintage Tape: “Clear Character” preset
    • Equalizer: Slight boost of +0.8 dB @ 11.227 kHz (Shelf)
    • Imager: 0‑199Hz = 0.0, 199Hz‑3.8kHz = 16.5, 3.8kHz‑11.6kHz = 31.6, 11.6kHz‑20kHz = 39.2
    • Vintage Compressor: “Smooth Opto” preset – threshold -19.9 dB, ratio 1.7:1, attack 30.1ms, release 97.0ms
    • Maximizer: IRC IV “Modern”, threshold -6.7 dB, ceiling -6.0 dB, Character 2.60
  • Dither: POW‑r #2 when converting from 24‑bit to 16‑bit.

Here’s the score for X9:

Identity is now available on all streaming platforms (such as Spotify), or you can also listen to it on Bandcamp.

The Gospel

Love the music, not the rules

I love the chord voicings and progressions in Gospel music and have been wanting to do a gospel-inspired song for a few years. Aretha Franklin’s “Amazing Grace” is one of the most powerful, uplifting, and spiritually rich pieces of music I have ever experienced. I watched videos on gospel piano and Hammond B3 to get a feeling of what would be involved and set out to write a song about feeling lost and then finding clarity and alignment. As the piece started coming together, something just didn’t feel right. I was getting “all the feels” as I hit the chorus, but also felt deeply wrong at the same time.

I am a big believer in spirituality and finding spiritual connections in the world, but I am not a fan of organized religion – historically, it has done so much more harm than good. So the song’s lyrics had to take a turn to feel honest to me. What started as a song about finding community through faith became a critique of religious rules and worthiness.

The final version is honest, even if it’s not what I originally planned. It’s full of gospel voicings, inversions, and the “Sunday scale” – but the message is mine.

In the arc of the Identity album, “The Gospel” adds more complex instrumentation and color, while extending the sentiment of “Angel” as the protagonist continues their search for connection and understanding, reaching for “something more”.


Special Recording Notes

  • All instruments were recorded in Logic at 24‑bit/96kHz.
  • Lead vocal: No external processing during recording – captured dry to leave flexibility for later.
  • Backing vocals: Mervyn Warren Choir, programmed via MIDI.
  • Bass: Electric bass played live.
  • Guitars: Two electric guitar parts played live.
  • Drums: Superior Drummer Reel Reel – Woodroom Drums. A new library to me – and I love it!
  • Organ: Logic Pro’s “Oakland Organ” and UA’s Waterfall Organ.
  • Piano: Native Instruments Kontakt “The Maverick” (using the “Deep Maverick” preset).
  • All tracks were exported into Luna for mixing.

Special Mix Prep Notes (Post‑Tracking, Pre‑Mixing)

  • Clip gain: Adjusted every vocal region to around -18 dB RMS before any processing.
  • Melodyne: Used for both pitch correction and the sibilant tool – far superior to FlexPitch.
  • Hardware Voxbox: Ran the lead vocal through my Manley Voxbox as a hardware insert. Settings:
    • Input: 12:00, Gain: 48, HPF: 80Hz
    • Compressor: Threshold 2:00, Attack Medium Slow, Release Medium Fast
    • De‑esser: LIMIT 10:1, Threshold 12:00
    • EQ: Low Peak 100Hz +1dB, Mid Dip 300Hz –8dB, Hi Peak 12kHz +8dB

Special Mixing Notes

  • Submasters: Created group submasters for Drums, Bass, Guitars, Piano, Organ, BVs/Choir, and Lead Vocal.
  • API EQ trick: Used on the electric guitars – +1 click of 3k on one guitar, +1 click of 5k on the other (UAD API 550).
  • Drums: Empirical Labs Distressor (modified “Parallel Drum Bus” preset) for parallel compression on the Reel to Reel Drums.
  • Bass: dbx 160 and Pultec EQP‑1A.
  • Lead Vocal: UA SSL 4000E on the channel. Empirical Labs Distressor (“Stronger Vocal Compressor” preset) for parallel compression. Shadow Hills (modified “Vox Male” preset) on the lead vocal submaster.
  • Vocal double: Created via Melodyne, processed with A‑Type (“Feeling That Way” preset).
  • Reverb: Capitol Chambers (modified “Big Vocal Sauce” preset) on a send for lead vocal.
  • Black Box on each group submaster:
    • Drums: “Mix Bus 4 Aggro Rock”
    • Bass: “08 Black Wow”
    • Guitars: “15 Guitar Opener”
    • Piano: “18 Mix Bus 2”
    • Organ: “35 Master‑Rock Anarchy”
    • BVs/Choir: “07 Airy Vocal”
    • Lead Vocal: “05 Acoustic Sparkle”
  • Mix Bus processing: Black Box, SSL G Bus Compressor, Fairchild 670, ATR-102, plus a Pultec EQP‑1A boosting & attenuating 2dB @ 100Hz & 10kHz.

Special Mastering Notes

  • Target LUFS: Aimed for approximately -14 LUFS at the climax.
  • Ozone settings:
    • Vintage Tape: “Clear Character” preset
    • Equalizer: Slight boost of +0.6 dB @ 10.696 kHz (Shelf)
    • Imager: 0‑182Hz = 0.0, 182Hz‑2.4kHz = 11.4, 2.4kHz‑12kHz = 29.1, 12kHz‑20kHz = 32.9
    • Vintage Compressor: “Smooth Opto” preset – threshold -18.6 dB, ratio 1.5:1, attack 28.6ms, release 46.9ms
    • Maximizer: IRC IV “Modern”, threshold -6.3 dB, ceiling -4.0 dB, Character 2.60
  • Dither: POW‑r #2 when converting from 24‑bit to 16‑bit.

Here is the leadsheet to “The Gospel”.

Identity is now available on all streaming platforms (such as Spotify), or you can also listen to it on Bandcamp.
Angel

For the Identity album, I wanted to start small and end huge, with complexity and volume building over time. To do this, I felt the first song had to be elemental and essential. What better way to convey this than with the most fundamental musical instrument: the human voice? That song would become “Angel”.

When I first started sketching the piece out, I sat at my keyboard with a notebook and a pencil. No complicated samples, just my voice and a simple piano sound. I needed to figure out the chords, the melody, and how the verses would shift from minor to major. That piano sketch became the blueprint for everything that followed.

I originally intended to sing all the vocal parts myself – four voices, stacked and blended. I created a lead sheet and rehearsed the main vocal with piano daily. But as my self‑imposed recording deadline approached, I realized that I was running out of time. I had never actually tried singing the other parts, and I wasn’t confident that I could get the blend and consistency I wanted in the time I had left. I needed a better solution.

Then I discovered Mervyn Warren’s Choir library (Spitfire Audio) during a Black Friday sale. That changed everything. Suddenly, I had a real‑sounding ensemble that could support my lead vocal without overpowering it. I ended up using the choir throughout the entire piece, from start to finish – introducing different sections of the choir at key points (bridge, final chorus) but always keeping a choral presence underneath.

Once I had a rough mix together, hearing everything blend together, I knew this was going to work as the opener to the album that I had originally imagined. Mixing and mastering this piece was pretty straightforward as there weren’t too many tracks and everything was sounding really good with some minimal processing.


Special Recording Notes

  • Lead vocal: Recorded in Logic at 24bit/96kHz.
  • No external processing during recording – captured dry to leave flexibility for later.

Special Mix Prep Notes (Post‑Tracking, Pre‑Mixing)

  • Clip gain: Adjusted every vocal region to around -18 dB RMS before any processing.
  • Melodyne: Used for both pitch correction and the sibilant tool – far superior to FlexPitch.
  • Hardware Voxbox: Ran the lead vocal through my Manley Voxbox as a hardware insert. Settings:
    • Input: 1:00, Gain: 48, HPF: 80Hz
    • Compressor: Threshold 12:00, Attack Fast, Release Medium Fast (“Classic LA2A”)
    • De‑esser: LIMIT 10:1, Threshold 9:00
    • EQ: Low Peak 100Hz +2dB, Mid Dip 300Hz –9.75dB, Hi Peak 20kHz +11.5dB

Special Mixing Notes

  • Choir: Mervyn Warren Choir, programmed via MIDI and rendered as audio, placed on its own fader groups. Created submasters for each choir section (e.g., soprano, alto, tenor, bass) and wrote automation to build dynamics across the song’s sections (intro, verse, chorus, bridge, outro).
  • Lead vocal chain: After the hardware insert, I set up two sends: one for parallel compression using a Fairchild 660, and another to a dedicated instance of Black Box using the “Airy Vocal” preset for some “dirt”. I blended both in with the main vocal track.
  • Reverb:
    • Lexicon 480L with the “Dialog 2” setting on one send.
    • Air Studios Reverb Essentials with the “Cathedral Strings” setting on another send, used during the climax.
  • Blackbox: Added to master bus with the “16 Mix Bus 1” preset – gave the whole track a subtle, warm glue.

Special Mastering Notes

  • Target LUFS: Aimed for -15 to -16 LUFS (intimate, natural, breath).
  • Ozone settings:
    • EQ: Made small adjustments – +0.8 dB on high shelf @ 10.5 kHz
    • Imager: Mid‑side mode – 0‑70Hz = 0.0, 70Hz‑2.8kHz = 24.1, 2.8kHz‑5.0kHz = 41.8
    • Maximizer: IRC IV “Modern”, threshold -6.5 dB, ceiling -5.0 dB, Character 2.60
  • Dither: POW‑r #2 when converting from 24‑bit to 16‑bit.

Here’s the lead sheet for Angel:

Identity is now available on all streaming platforms (such as Spotify), or you can also listen to it on Bandcamp.

How Identity Came Together (A Personal Account)

Identity is now streaming everywhere and on Bandcamp. This is how it was made.

While doing an annual year‑end review of 2024 and planning for 2025, I started jotting down ideas on my whiteboard for a new music project – things that might be fun and interesting to try.

My initial brain dump

Some ideas were based on tools I wanted to use and/or get more familiar with (Spitfire Audio’s Fragile String Evolutions, Abbey Road Strings, Abbey Road Percussion, Universal Audio’s Luna and mixing plugins, Tone Master, Superior Drummer, Omnisphere, and Dorico). Others were genres I wanted to explore (Texas guitar, Motown‑ish funk bass, gospel chords & changes, a Nine Inch Nails‑style synth piece, an acoustic piece, a Radiohead‑meets‑Soundgarden song, a guitar texture looping piece, and a long textural orchestral composition).

I started by creating an abstraction of how I imagined the album starting and finishing, with some artist references to draw from.

Initial ideas for the album contour abstraction

I then fleshed out the abstraction to get an even clearer picture of what happened in between.

Filled out the abstraction by defining each piece from start to finish.

The working title was Harvest. I gave myself three months (June 1 to August 31, 2025) to finish it. (Spoiler: that didn’t happen.) For the most part, I stayed true to these abstractions and musical sketches I put together in that first week. 

The album became Identity – nine tracks that start small and elemental (a cappella) and end huge, bombastic, ornate, and broad, with everything in between. To prepare, I listened to and studied artists I’ve long admired: Todd Rundgren’s “Pretending to Care” (for the a cappella piece); Aretha Franklin’s “Amazing Grace” (gospel); Ry Cooder, Jedd Hughes, and Lyle Lovett (that lonesome Texas guitar feeling); Joe Dart’s playing on Vulfpeck’s “Dean Town” and James Jamerson for Motown funk; Robert Fripp’s Frippertronics (guitar looping); Nine Inch Nails’ Tension 2013 tour (Pino Palladino on “Sanctified”) and their collaboration with David Bowie (“I’m Afraid of Americans”) for a hard‑hitting synth piece; Ligeti and Penderecki (aleatoric and textural ideas); and Peter Gabriel’s New Blood Orchestra versions of “Signal to Noise” and “Rhythm of the Heat” (which informed my approach to the orchestral piece).

Again, my initial timeline was more than a little optimistic – “Vantage”, the orchestral piece, took on a life of its own. It grew from the Radiohead‑meets‑Soundgarden rock song into a large symphonic piece with a notated score and full orchestral instrumentation. It had so many challenges: compositionally (many metric modulations & meter changes), technically (maxed out rendering memory in Luna), and emotionally (it seemed to never end). It was a massive undertaking.

I created numerous spreadsheets to handle project planning, tracking, and observations along the way – things to remember next time. They were invaluable in helping me to get my thoughts clarified and progress tracked. Here are some screenshots of a few of them.

Songwriting status spreadsheet

Pre-Production tracker

Chigiana-styled composition planning spreadsheet for the orchestral piece, Vantage

Production tracker for all songs

Mixing and mastering prep tracker


Below is the monthly summary of how the whole thing unfolded – the good, the bad, and the metric modulation.

2025

May – Planning & Listening Parties
I spent the first week just listening and imagining. A cappella, Texas guitar, gospel, looped/texture guitar, funk, acoustic guitar, NIN‑style synth, Radiohead‑meets‑Soundgarden, orchestral – I wanted nine distinct genres that would somehow feel like one album. The working title was Harvest. I felt inspired.

June – Songwriting Drill Downs
Structured writing sessions, daily acoustic rehearsals, and “Cafe Show & Tell” (CST) performances for my wife. The Open D piece (I-40) started to feel real.

July – A Slow Month
I dove into the ThinkSpace BBCSO course as well as an InsideTheScore composing challenge. Little direct album progress, but my skills improved.

August – Intensive Writing & Research
Deep dives into Todd Rundgren, Aretha Franklin, Robert Fripp, Ry Cooder, Jedd Hughes, Lyle Lovett, Joe Dart & Vulfpeck, Robert Fripp, Nine Inch Nails, Radio Head, Sound Garden, Peter Gabriel & New Blood Orchestra, as well as the composers Holst, Ligeti and Penderecki. Daily work on all songs in rotation. By the end of the month, I had most song structures as well as full lyrics for the Gospel and NIN pieces. “Yes!!”

September – Daily Rehearsals & Charts
Wrapped up writing of structures and lyrics. Rehearsed all songs six or seven days a week. Started doing deep‑focus rehearsals: Angel section by section for 50 minutes, Fields and Gospel for 30 each, etc.. Lead sheets in Dorico underway.

October – Charts, CST & Logic Templates
Finished charts for Angel, Gospel, and RadioGarden. Restrung all guitars. Created Logic template files for every song – tempo, meters, markers, chord track. Continued performing at CSTs.

November – Production Begins
Recorded scratch tracks, primary guitar parts, and vocals. Re‑amped Fields through my pedalboard – “sounds amazing!” Also added more Spitfire libraries, UAD plugins, and Superior Drummer SDX to my system.

December – Vantage Takes Over
Everything came to a halt due to metric modulation and orchestration issues for Vantage. Eventually figured it out, after losing a lot of momentum. Then completed notation of Vantage – 2nd verse, chorus, strings, bridge, outro, transition. “Made significant progress – feeling good about the piece again.” 

2026

January – Orchestral Scoring & Logic Transition
Exported Dorico MIDI to Logic. Assigned articulations for every instrument. Fixed tempo errors where “.500” had gone missing. Discovered that Horns 1‑4 share samples (legato nightmare). Used Tim Davies’ approaches for string and woodwind arrangements – spread out arpeggios became a lifesaver.

February – Articulation Hell → Breakthrough
Created SHORTS and LONGS track stacks. Then the workflow adjustment that saved me: Humanisation → Quantisation (40%) → Copy to SHORTS → Re‑assign articulation → Delay offset. Applied to every instrument. The result? “Can’t express how relieved I feel … sounds so much better.” I rendered virtual instruments to audio and never looked back.

March – Vocals, Melodyne & First Luna Mix
Learned Melodyne (YouTube and Groove3). Started mixing in Luna, with “The Gospel” being the first song. Discovered clipping before the second chorus – a poorly edited comp region. But then: hardware Manley Voxbox on lead vocal. Huge difference. My vocal recipe became: clip gain → Melodyne → Voxbox → parallel Distressor → Shadow Hills + Pultec. Blackbox on the master bus – “sounds amazing”.

April – Album‑Wide Mix Prep
Mixed Angel, Fields, X9, Us, I‑40, Freedom, and Disintegration in Luna. Built a repeatable template. Added to my plug‑in cheat sheet: AMS doubling, Cooper Delay (default for widening), Oceanway in reverb mode.

May – Vantage Deep Mix, Mastering & Burnout
DeepSeek helped me generate tables for tape machines, console emulations, summing, reverbs, and delays. Then I created a Mix Processing Bus – all submasters → processing bus → trim bus. This let me keep my tone while hitting -6dB peak for mastering. Vantage went through multiple iterations. I was exhausted. I made a Plan B (only Adaptive Limiter) and a Plan A (full Ozone processing). Plan A sounded better. 

June – Submission & Release
June 1st: Submitted the audio files to CDBaby. June 5‑8: I went back and updated Vantage Dorico score with timpani, bass drum, piatti, tubular bells, tam tams. June 9: CDBaby passed inspection – album appeared on Apple Music, Amazon Music, Spotify and other streaming services. June 11: Set up Bandcamp release. Announced album release on my website.


Things I Want to Remember for Next Time

  • Abstractions for everything! – for albums, songs, lyrics, arrangements, mixes, mastering.
  • Parallel processing – work on all songs in rotation. Prevents getting stuck.
  • Keeping a project log was super helpful. Often I lost track of what I did and/or when I did something and having the log helped to put things in perspective.
  • Whiteboard word dumps – adjectives and emotional arcs before writing lyrics.
  • Modeling after other songs (e.g. Afraid of Americans) was super useful
  • Songwriting Status Table before notation, huge help!
  • Created Chigiana-like spreadsheet to identify everything I might want to do in Vantage. Definitely helped to give clarity.
  • While notating challenging parts, determine rhythms first then add pitches
  • Having a piano reduction for Vantage was key, particularly for the arpeggios in the WWs.
  • Having the Chord Track in Logic was super helpful, even just for reference while playing parts in live.
  • Rehearsals: 1) Extended focus (repeat one section at a time until locked) 2) Going over all songs for a couple of months was huge
  • Remembering Confidence on opening line is everything
  • Performing @ CST (Cafe Show & Tell) – weekly creative sharing. Uncovered every blind spot.
  • Re-Amping with two amps rules (Tone Master + Landau = Amazing)
  • Stereo pair mic’ing for room tones worked beautifully (watch for positioning and phase coherence)
  • Tim Davies approaches – string & woodwind arrangements, spread out arpeggios.
  • Shorts/Longs + delay offset – essential for realistic sample orchestras.
  • Remember to keep original MIDI tracks with Virtual Instruments removed after bouncing to audio. Hide, but keep them around.
  • Clip gain to -18dB RMS on all audio tracks.
  • Melodyne – superior to FlexPitch. Sibilant tool is a lifesaver.
  • Hardware Voxbox – massively better than software. Use it.
  • Parallel compression on acoustic guitar is awesome! Loved the Fairchild 770 on Us (Time Constant set to 5, cranked the input gain and the threshold so that -10dB of compression was applied.
  • Using different Studer A800 machines and tape formulations/setting per instrumentation group made a huge difference to create space EQ wise. See project log for specific settings.
  • DeepSeek was invaluable in figuring out which tape machines, tape, & settings to use in Vantage (orchestra & rock instrumentation). Also gave really helpful guidance in delays and reverbs to use on all instruments other than the vocals (see project log for specific settings). Really great.
  • Blackbox HG-2: “Mix bus 1” preset is pretty excellent on just about anything
  • Other plug-in mentions: AMS vocal doubling, Cooper Delay (default) for widening and giving presence particularly synth bass, and Oceanway in reverb mode on a send
  • Mix Processing Bus – submasters → processing bus → trim bus to -6dB. Decouples tone from delivery level.
  • Plan A / Plan B – always have a safety net. Saved me multiple times.
  • 96kHz workflow – record/mix at 96kHz, then convert: 24/96 → 24/44.1 → 16/44.1 with POW‑r #2 dithering.
  • The making/creating is the prize/goal. I’ll never be this intimate with these songs again.

What to Avoid (or Do Better)

  • Never skip the metronome during rehearsals – even if not recording to click. My timing suffered.
  • AI isn’t always great at doing musical analysis and often makes mistakes on advanced usage of music and audio apps.
  • Need a way to circle back to/review original intentions – e.g., The Gospel drifted from its original meaning. A one‑page abstraction for the lyrics might have caught it.
  • Create a tempo track before layered recording – I‑40 drifted because I had no click.
  • Need to remember to voice lead better when writing on guitar and transferring to other instruments
  • Practice in the recording setup – outside noise and unfamiliar mic position ruined takes.
  • Hit a roadblock w/ orchestrating Vantage. I think I was making it too important.
  • Don’t let burnout drive decisions – when exhausted, make a Plan B, rest, then do Plan A properly.

Identity is now available on all streaming platforms (such as Spotify), or you can also listen to it on Bandcamp.

InsideTheScore Composing Challenge

I recently took part in the InsideTheScore composing challenge and found it to be a worthwhile experience. The challenge gave me an opportunity to revisit my composition process and reinforce important concepts in orchestral writing.

Day 1: Laying the Foundation

  • Mission: Develop a clear musical theme and establish the general structure.
  • The defined parameters (intro, main idea, development, wind-down) provided clarity and direction. Referring to the Songwriting Sourcebook’s chord table helped in creating a solid chord progression that shaped the piece.
  • I worked out initial ideas using pencil and guitar, capturing sketches with quick recordings on my phone.

Day 2: Orchestrating the Melody

  • Mission: Assign the main theme to orchestral instruments for greater impact.
  • Using Dorico to notate and then arranging in Logic, I split the melody across different orchestral sections. It was a useful reminder of how some software routines can become less familiar without regular use.

Day 3: Adding Depth with Harmony and Rhythm

  • Mission: Build supportive harmonic and rhythmic layers beneath the main theme.
  • I incorporated rhythm based on my guitar sketch and adapted the score using ensemble patches, which improved workflow. Planning textures and refining data was important in keeping the arrangement clear.
  • On this day, I also created a table of parts for each section of the piece, centered around melody, chords, rhythms, and bass to help organize and clarify the roles of each element throughout the composition.

Day 4: Developing Counterpoint and Interaction

  • Mission: Create a middle layer to interact with the melody.
  • I shifted to a four-stave layout (melody, counter-melody, harmony, bass), focusing on getting the musical parts balanced using piano sounds. Removing problematic MIDI data was necessary to resolve some technical issues.

Day 5: Final Touches and Detailing

  • Mission: Add percussion and color instruments for a finished, cohesive sound.
  • After introducing percussion and adjusting mix elements, I exported and shared the completed piece.

Key Takeaways

  • Having a complete sketch of melody and chords for the entire piece from the outset is crucial. This foundational step streamlines the process, gives structure to the work, and clarifies the direction for orchestration and development.
  • Defined structure and planning are helpful throughout the process.
  • Tools like chord tables and ensemble patches can streamline writing.
  • Creating a table of parts for each section, focusing on melody, chords, rhythms, and bass, aids organization and clarity.
  • Remove all unnecessary CC data from imported Dorico MIDI files (particularly CC #7 as it wreaked havoc on Spitfire BBCSO master volumes during Day 4).

Here’s the audio of the final version of the piece:

Here are the charts I put together for this project:

Big thanks to Oscar Osicki & his team at InsideTheScore for putting this challenge together.

Revisiting Colossus—Building a Full Orchestral Score and Template

This past spring, I dove into the Spitfire Audio Colossus Re-Scoring Competition with an approach that started simple: a piano reduction in Dorico, then a MIDI export to Logic Pro, where I fleshed out the arrangement using Spitfire’s Contemporary Drama Toolkit, Abbey Road One, Ólafur Arnalds Cells, and Omnisphere 2. For a full breakdown of that process, see my post here.

After the competition, I decided to take things further by creating a full orchestral score in Dorico and building a new Logic Pro template based on Spitfire’s BBC SO and Abbey Road Orchestra. My goal was not only to improve the sound, but also to test a workflow I could use for future orchestral projects.

The Good: Dorico’s Notation Power

Writing the expanded score in Dorico was a pleasure—everything felt intuitive and efficient, especially compared to Finale. But when it came time to export MIDI for Logic, I hit a few snags.

The Not-So-Good: MIDI Export Challenges

Depending on the expression map you are using, Dorico exports a lot of extra MIDI data, and there’s no way to turn it off. The expression and modulation information didn’t translate well to Logic, so I ended up deleting everything but the notes and velocities and redoing all the expressive details by hand. The BBC SO expression maps from Dorico’s website didn’t help much either.

I get that Dorico can’t know how I want velocities mapped to my sample libraries, but it still made the process more tedious than I’d hoped.

Mixing & Template Insights

Spitfire’s plugins have multiple volume controls, which can get confusing. I found that using Logic’s mixer for overall volume, and plugin controls for expression/modulation, made things much easier. Other key takeaways:

  • Logic’s velocity values didn’t always match Dorico’s (fff = 100 instead of 120–127).
  • Short articulations need careful velocity/expression; long ones depend on modulation.
  • Map divided parts (like Flute 1 & 2) across solo instrument/leader and section instruments.
  • Quantizing and humanizing MIDI in Logic helped restore a natural performance.

Mixing Approach

For this version, I used the AMEK 9099 on group buses (details here), and my usual mix bus chain: SSL G Bus Compressor, Fairchild 670, and ATR-102.

Downloads & Links

  • My updated 2025 Orchestral Template for Logic Pro:
  • This is the final audio master of the piece:
  • You can view and download the Full Score here:
  • This is the final version of the video:

Conclusion

Upgrading my competition entry was a valuable learning experience. Dorico is a fantastic notation tool, but exporting to Logic for detailed mockups still takes some manual work. The payoff: a more expressive, nuanced orchestral sound—plus a workflow I’ll use again.

Dorico

Towards the end of last year I decided to try out a demo version of Steinberg’s Dorico Notation Software, as I had heard great things about it from some of my friends at Chigiana. I loved it so much that I bought a full version once the demo expired. How I wish that I had been able to use it while I was in Berklee’s program. It’s so much more enjoyable to work with than Finale, on so many levels. 

While I found some great tutorials on YouTube and Groove3, it wasn’t the same as doing a real project, from start to finish. For this I chose to create a project that would combine a few things I had been wanting to do for a while. 

First, notate a full orchestral score in Dorico, while using Note Performer (which I hadn’t really used yet). Secondly, analyze and recreate some of the scores in composer Ryan Lynch’s “10 ESSENTIAL Orchestral Scores You Need To Study” list. For this project I chose to focus on Mozart’s Symphony No 40 in G minor.  

Based on the original score found on IMSLP, here is the version that I created (first five minutes of the piece):

And here is the audio via Note Performer (and some processing in Logic using UAD’s Studer A800, SSL G Bus Compressor, Fairchild 770, and Ozone 9): 

Below is the analysis that I put together, based on Ryan Lynch’s template:

Overall, I really enjoyed this project as it helped me to get more familiar with Dorico while giving me an even deeper appreciation of just how great Mozart’s music is. Just amazing!