MUSIC PROJECT PHASES SUMMARY

My Music Project Development Framework – From Idea to Release

Over the course of making the Identity album, I developed a workflow that I now consider my default for any large-scale music project. It’s divided into six phases: Writing, Pre-Production, Production, Post-Production, Mastering, and Delivery. These aren’t rigid boxes (they overlap and blur) but having a mental map of where I am in the process helps me stay focused and organized.

What matters more than the steps themselves is the mindset behind them. Two principles guided everything I did:

  1. Start with the end in mind. Before I wrote a single note, I defined what the project was, what it was about, and where it was going. This is the “abstraction”. I returned to this process whenever I wasn’t clear on what to do next. It kept me from drifting and stalling out.
  2. Feel as if it is already done. This is the creative equivalent of visualization. I worked from the assumption that the album was complete and perfect, and I was simply discovering it. This shifted my energy from “trying” to “receiving”.

With that in mind, here is how the project unfolded.


Phase 1: Writing (The Creative Birth)

This is where the seed is planted. Before any technical decisions are made, I focus entirely on the creative vision – the musical and lyrical content of the album.

Key activities:

  • Album‑level abstraction – defining the emotional arc, the “sound world” (in terms of feelings, not gear), the track order, and the intended journey for the listener.
  • Listening parties and research – curating reference tracks and deeply analysing artists I admire (Todd Rundgren, Aretha Franklin, Robert Fripp, Lyle Lovett, NIN, etc.) to understand what made their music connect.
  • Song abstractions – for each song, answering four questions: What is this? What does it do? What is it about? Where does it go?
  • Whiteboard sessions – generating adjectives and mapping emotional arcs before writing a single lyric or chord progression.
  • Melody, chord progression, and lyric writing – using songwriting rotations, free‑writing, and random prompts (Storymatic cards) to generate material.
  • Lead sheets and piano reductions – distilling the song down to its essential elements before moving to full arrangements.
  • Parallel processing – working on all songs in rotation, not one at a time. This prevented me from getting stuck on a single piece and kept the album feeling cohesive.

Why it matters: This is where you answer the big questions. If you do this well, the rest of the process is a matter of execution. The abstractions and emotional arcs are the compass that guides everything that follows.


Phase 2: Pre‑Production (The Blueprint)

Once the songs exist, the next step is to prepare them for the studio. This is the technical preparation phase – taking the creative ideas and turning them into a workable plan.

Key activities:

  • Full notation and scores – using Dorico to create full scores for orchestral pieces, and lead sheets for simpler songs.
  • Instrumentation and sound palette – deciding which instruments, libraries, and outboard gear will be used for each track (feelings are now translated into specific tools).
  • DAW template setup – creating Logic or Luna files for each song with tempo, meter, key signatures, markers, and chord tracks already in place.
  • Hardware prep – restringing guitars, testing hardware inserts (like the Manley Voxbox), and setting up re‑amping chains.
  • Rehearsal – daily rehearsals of all songs in rotation, always with a metronome (a lesson learned the hard way), and recording every session for later reference.
  • CST (Cafe Show & Tell) – weekly listening/performance sessions with Bon (my wife) to get honest feedback and uncover blind spots.

Why it matters: Pre‑production is where the blueprint becomes concrete. If you do this well, the rest of the process is a matter of execution. If you skip this, you spend the rest of the project making guesses.


Phase 3: Production (The Execution)

This is where the recording happens – both the “real” instruments and the virtual ones. It’s also where a lot of the heavy lifting happens in terms of editing and sound design.

Key activities:

  • Recording – capturing live instruments (guitars, bass, vocals) using multi‑mic techniques, DI recording for re‑amping, and careful gain‑staging.
  • MIDI programming – drums (Superior Drummer), synths (Omnisphere, UA Anthem), and orchestral samples (Spitfire BBCSO and ARO).
  • Vocal production chain – a consistent workflow that became essential: clip gain to -18dB RMS → Melodyne (pitch & sibilance) → Hardware Manley Voxbox → parallel compression → bus processing (Shadow Hills, Pultec).
  • Re‑amping – recording DI signals, then running them back out through real amps and pedals (e.g., re‑amping “Fields” through the Tone Master and Landau amps, or through the Strymon BigSky for shimmer).
  • SHORTS/LONGS workflow – for orchestral samples, blending long articulations with short ones for more realistic performances, applying delay offsets, and rendering virtual instruments to audio to save CPU.
  • Session management – keeping safety MIDI tracks, SMPTE‑locking regions, and making safety duplicates of keeper takes.

Why it matters: Production is where the blueprint becomes sound. The key is to work efficiently and not let technical problems derail the creative flow. I learned that it’s always better to record DI and re‑amp later, and that practicing in the actual recording setup makes a huge difference (to me and my neighbors).


Phase 4: Post‑Production (Mixing)

Mixing is where the individual tracks become a cohesive whole. I did all of my mixing in Luna, using UAD, Brainworx, and Spitfire Audio plugins.

Key activities:

  • Gain‑staging – ensuring every track hit the processors at the right level (clip gain to -18dB RMS).
  • Submasters and groups – creating submasters for each instrument family (drums, bass, guitars, synths, vocals) and writing automation on those submasters to build dynamics.
  • Tape and console – using Studer A800 and ATR‑102 on individual tracks and subgroups, and matching console emulations (SSL, Neve, API) to each instrument group.
  • The Mix Processing Bus – this was a critical innovation. I ran all submasters into a dedicated processing bus (with all my mix bus plugins), then into a trim bus to bring the level down to -6dBFS for mastering. This decoupled the tone from the delivery level, so I could drive the plugins hard while still delivering a clean, headroom‑rich mix.
  • Parallel processing – using parallel compression and distortion on drums, vocals, and acoustic guitars (Fairchild 660, Distressor, LA‑3A).
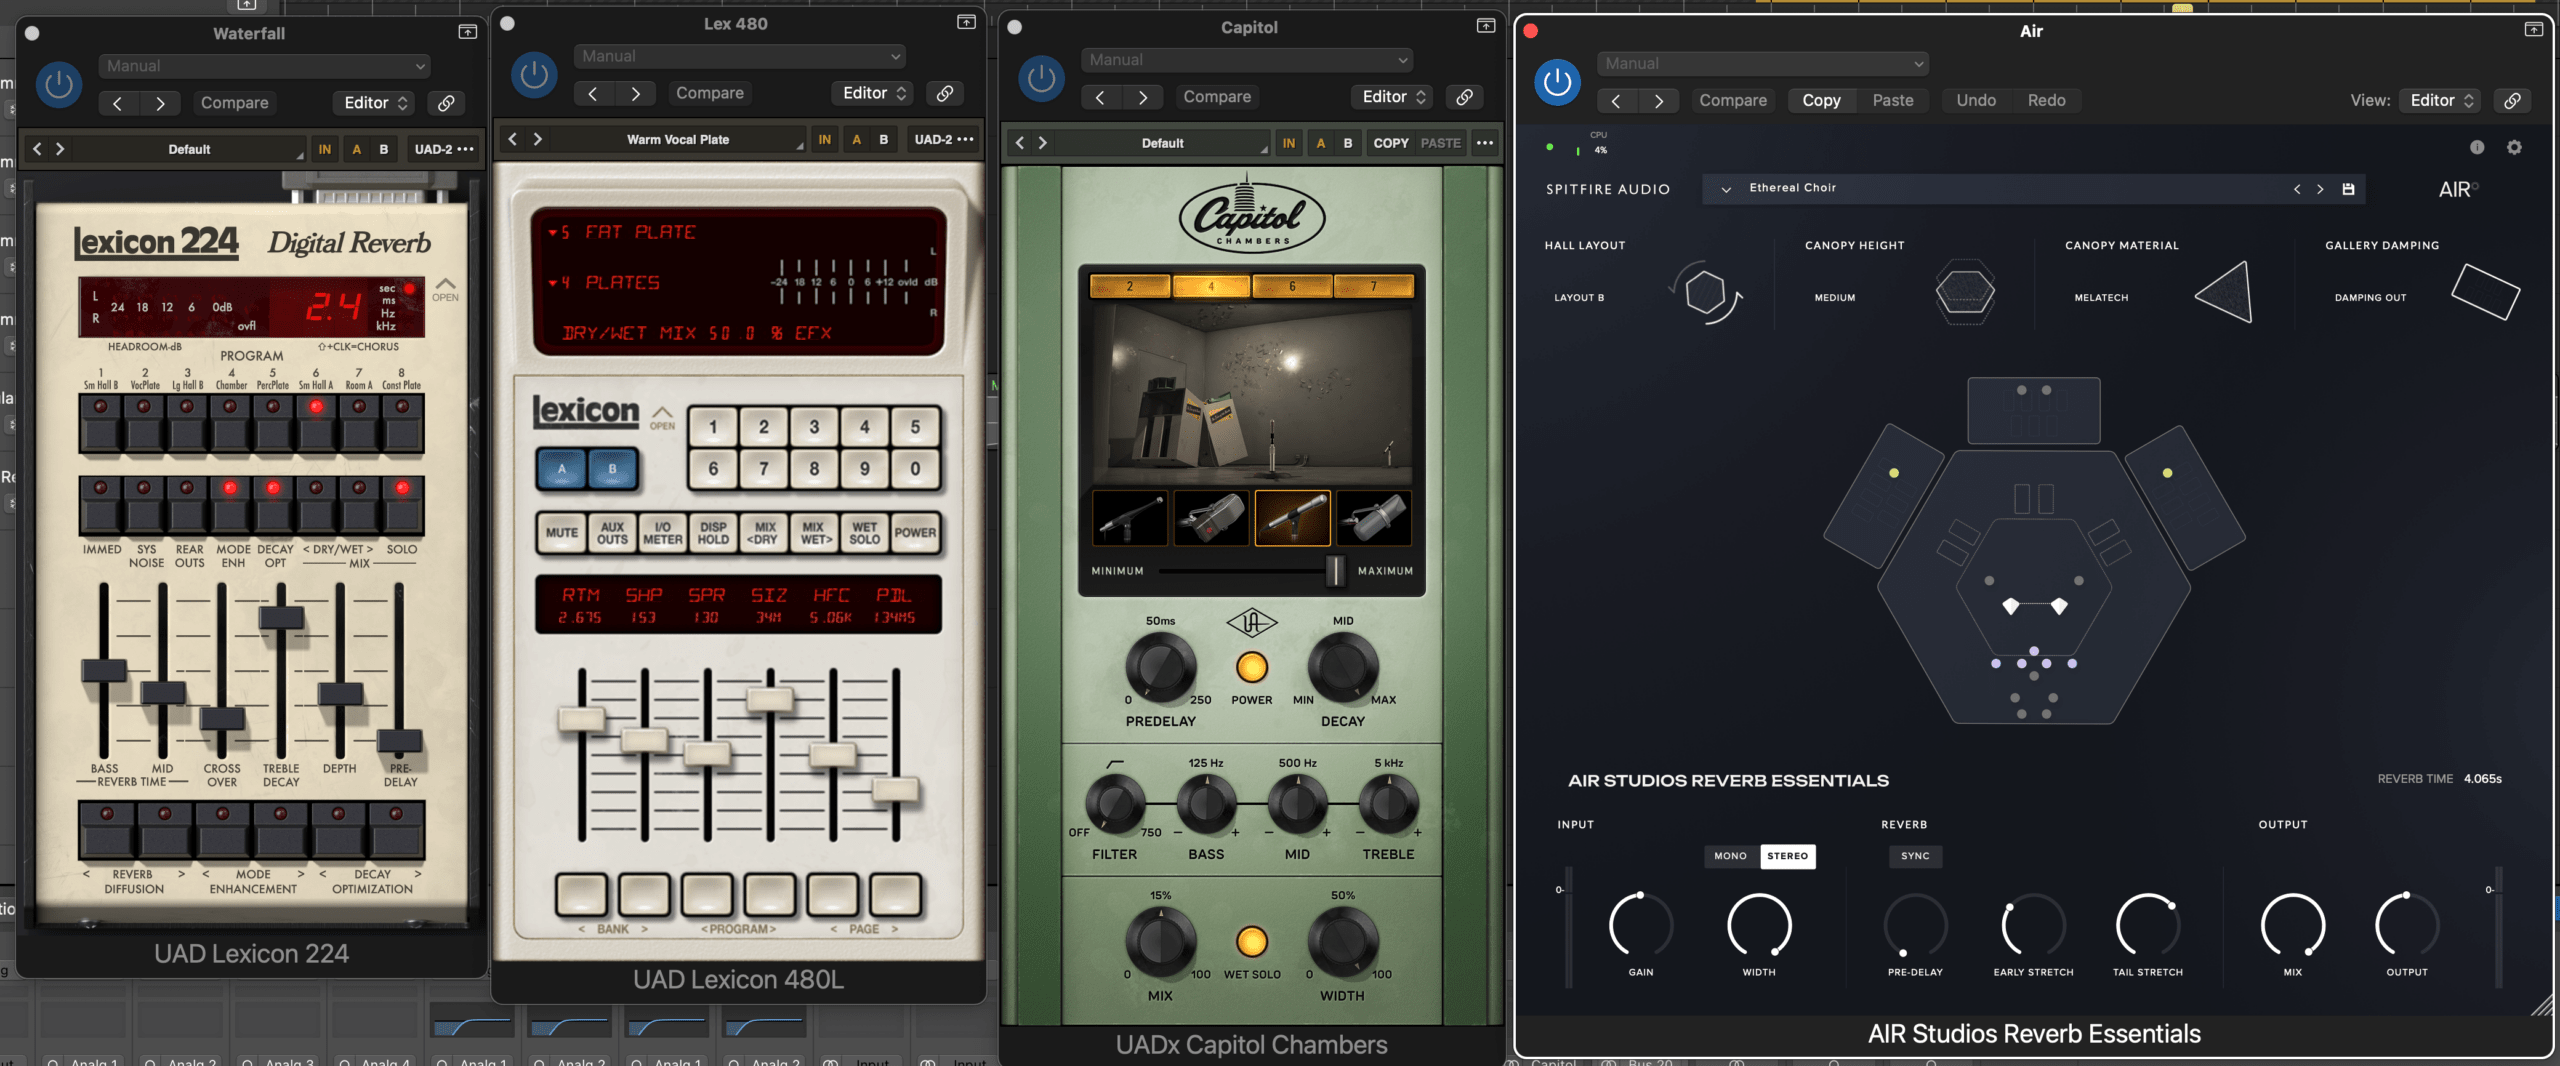
  • Reverb and delay – using a consistent palette across the album (Lexicon 480L, Capitol Chambers, Air Studios Reverb Essentials, EP‑34, Cooper Time Cube).

Why it matters: Mixing is where the emotion of the performance meets the clarity of the production. The Mix Processing Bus was a game‑changer – it gave me the best of both worlds: the sound I wanted and the headroom the mastering sessions needed.


Phase 5: Mastering (The Final Polish)

Mastering is the bridge between the mix and the final release. My goal was to give the album a cohesive sound while preserving the dynamic arc I had built.

Key activities:

  • Defining LUFS targets – I wanted the album to build in volume and intensity as it went on, so I created specific LUFS values for each track, based on its genre and position in the album.
  • Plan A / Plan B – I had two mastering plans for this project: a full Ozone chain (tape, EQ, imager, compressor, maximizer) and a simplified version (only Adaptive Limiter). The simplified version served as a safety net and reference.
  • Genre‑specific settings – applying different Ozone presets and chains for each track (a cappella, acoustic, gospel, funk, etc.).
  • True peak limiting – using a true peak limiter (bx_limiter) to catch any intersample peaks.
  • Dithering – applying POW‑r #2 dithering when converting from 24‑bit to 16‑bit.

Why it matters: Mastering is the final quality control. It’s where you ensure the album sounds consistent, translates well across systems, and has the right loudness for its intended delivery.


Phase 6: Delivery (The Finish Line)

This is the final step – getting the album out into the world.

Key activities:

  • Trimming – cutting silence from the tops and tails of all tracks.
  • Format conversion – creating multiple delivery formats: 24/96 (archive), 24/44.1 (high‑res), and 16/44.1 (CD/streaming).
  • Dithering – applying POW‑r #2 dithering when reducing bit depth.
  • Listening parties – holding final listening parties with Rachel to confirm the album worked as a whole.
  • Metadata – preparing track titles, artist name, album art, and ISRC codes.
  • Submission – uploading to CDBaby for distribution to streaming platforms.

Why it matters: Delivery is where the project leaves your hands and enters the world. It’s easy to rush this phase, but taking the time to get the formatting, naming, and metadata right ensures the album is presented professionally.


Final ThoughtS

The process is a cycle. I documented every phase thoroughly, and after the album was released, I conducted a full retrospective – writing down what worked, what didn’t, and what to improve next time. That retrospective is now my first step before starting any new project.

Disintegration

NIN, aggressive synths, and the sound of falling apart

I love the textures and sonics that Trent Reznor and Atticus Ross are able to create in their productions. The Nine Inch Nails collaboration with David Bowie on “I’m Afraid of Americans” is a particular favourite of mine – it’s intense, aggressive, and full of atmosphere. I wanted to capture some of that intensity for the Identity album.

This is the penultimate track on the album. The song came together from a bass idea I recorded in Voice Memos in May 2025. Once I started production in August, I built layers of synths (Omnisphere and UA Anthem), drums (a blend of Logic Drum Machine Designer, Superior Drummer, Battery, and Butch Vig Drums in Kontakt), and electric bass guitar. The vocal was recorded at the end, then chopped into three separate tracks for unique processing on the verses, pre/post choruses, and choruses.

On the album, “Disintegration” is the low point. After the introspection of “X‑9”, the protagonist hits a wall – the search for connection has led to frustration and a sense of futility. Everything feels like a lie and everyone is seen as a liar, and the music reflects that collapse.


Special Recording Notes

  • Analog instruments: Recorded in Logic at 24‑bit/96kHz.
  • No external processing during recording – captured dry to leave flexibility for later.
  • Vocals: Pitch and sibilance corrections via Melodyne.
  • Hardware Voxbox: Ran the lead vocal through my Manley Voxbox as a hardware insert (settings provided earlier).
  • Synths:
    • Omnisphere 3 – emulations of Access Virus Indigo, JD‑800, JP‑8, JX‑8P, JX‑10, Korg 707, Moog Matriarch, Prophet 5, Prophet 6, Prophet 12, Reaktor, and Yamaha TX Stack Strings (TX802 & TX816).
    • UA Anthem – 5 tracks.
  • Drums: Blended from multiple sources:
    • Logic Drum Machine Designer (“Hollywood Haze” preset)
    • Superior Drummer (“Nashville Slam” & “Stonewood” kits)
    • Battery 4 (“Glowstix Kit”)
    • Butch Vig Drums (Kontakt instrument)
  • Bass:
    • Electric bass (3 tracks: DI, MXR Synth Bass Pedal, and OC‑3 octave pedal)
    • Synth bass tracks (derived from MIDI generated by FlexPitch on the original electric bass track)
  • Session size: Over 65 tracks/channels in the Luna file.
  • Recording environment: All electronic or electric – the biggest challenge was getting all the tracks to sit well and balance with one another.

Special Mix Prep Notes

  • Clip gain: Adjusted every vocal region to around -18 dB RMS before any processing.
  • Melodyne: Used for both pitch correction and the sibilant tool.
  • Hardware Voxbox: Ran the lead vocal through my Manley Voxbox as a hardware insert.

Special Mixing Notes

  • Processing:
    • Vocal sections:
      • Verses: Dry, direct, and gritty with some distortion.
      • Post‑choruses: Variety of processing – distortion, tremolo/panning, granular synthesis (Omnisphere Granular engine on the “Not your supplicant” line), delay, chorus, and high & low pass filters.
      • Choruses: Brighter and more open with added ambience (reverb).
    • AMS DMX 15‑80 S: Modified “Vocal Doubler” preset – new to me and very effective.
    • Moog Multimode Filter: Used on post‑chorus vocals.
    • Black Box: On each group submaster (Drums, Bass, Synths, Vocals).
    • Drums:
      • 1176AE on parallel drum bus (“Parallel Drum Crush” preset)
      • Raw (“Super Charger” preset) on a drum bus send
    • Vocals (parallel compression):
      • 1176 Rev A into LA‑2A Silver on verse and post‑chorus vocal tracks
      • Fairchild 660 (“Lead Vocal Parallel” preset) on a send of the chorus vocal track
  • Reverb:
    • UA Lexicon 480L (“Dialog 2” preset)
    • Spitfire Audio Air Studios Reverb Essentials (“The Hall” preset) on chorus vocals
  • Mix Bus processing: Black Box (“16 Mix Bus 1” preset), SSL G Bus Compressor (modified Default setting), Fairchild 670 (Modified “Stereo Bus” preset), ATR‑102 (“Classic 250 Smooth Master” setting).

Special Mastering Notes

  • Target LUFS: -13 @ peak
  • Ozone settings:
    • Vintage Tape: “Clear Character” preset
    • Equalizer: Slight boost of +0.8 dB @ 11.227 kHz (Shelf)
    • Imager: 0‑152Hz = 0.0, 152Hz‑2.7kHz = 20.3, 2.7kHz‑12kHz = 30.0, 12kHz‑20kHz = 43
    • Vintage Compressor: “Smooth Opto” preset – threshold -18.6 dB, ratio 1.5:1, attack 28.6ms, release 46.9ms
    • Maximizer: IRC IV “Modern”, threshold -5.8 dB, ceiling -1.5 dB, Character 2.60
  • Dither: POW‑r #2 when converting from 24‑bit to 16‑bit.

Audio Examples

🎧 Granular processing on the “Not your supplicant” line – isolated track

🎧 Same section in context with all other tracks


PDF

  • 📄 Lyric sheet

Identity is now available on all streaming platforms (such as Spotify), or you can also listen to it on Bandcamp.

X‑9 / Inner Signals

Frippertronics, texture looping, and the search for a new sound

The seventh song on Identity is “X‑9 / Inner Signals”. It started as an experiment in texture looping – a chance to explore the Frippertronics approach that I had heard about but never looked too deeply into. I had listened to an interview with Dave Matthews on his approach to playing guitar, and he mentioned that he had been influenced by Robert Fripp and tried to incorporate some of those ideas into his playing. That reminded me how much I had enjoyed Mr. Fripp’s playing as well, and it got me digging around for inspiration.

The piece is divided into two distinct sections. The A section is ethereal and dreamlike; a wash of texture and atmosphere based on a simple two‑note phrase in C# minor (Aeolian). I built this section using loops on my pedalboard, layering reverb, delay, and modulation to create something expansive and meditative. This is the “Inner Signals” part, and I used Robert Fripp’s recording of “Holy Night” as a basis for its approach.

The B section is hyper‑active, jagged, and angular. It’s also in C# minor, but the feel is completely different – driving, aggressive, and rhythmically complex. For this section, I used three guitar parts (low, middle, and high), each with its own character and processing, with a bass track throughout.

On the album, “X‑9 / Inner Signals” represents a moment of introspection. After the release of “Freedom”, the protagonist turns inward – the textures and loops reflect the complexity of inner thoughts and the search for clarity. The two sections mirror that internal tension: the dreamy search and the jagged, restless questioning.


Special Recording Notes

  • Guitars: Les Paul (low part), Telecaster (high part), Strat (mid part).
  • Bass: Electric bass (recorded DI, with MXR Bass Synth pedal).
  • Pedalboard signal chain: Guitar → Freqout → EP Boost → Volume Pedal → Strymon Timeline → Strymon BigSky → Apogee Quartet.
  • Other effects: All other effects (amp simulators, Brigade Chorus, EP‑34, Logic’s Tremolo) were applied in Logic on a track‑by‑track basis.
  • Live looping: I learned about and experimented with Logic’s Live Loops feature, but opted to create loops on my pedalboard and record those onto separate tracks in Logic. It just felt easier to get what I wanted from the looper pedal.
  • Session size:
    • A section: 7 audio tracks with 3 aux tracks for additional processing.
    • B section: 6 audio tracks with 3 aux tracks for further effect processing.
  • Process note: I had completely figured out all the parts for the B section while having only a vague notion of what I wanted for the A section. It wasn’t until late in the recording of the rest of the album that I came back to work on the A section (the looping part). Fortunately, that turned out to be a relatively quick process. From start to finish the A section only took a few hours.

Special Mixing Notes

  • Processing:
    • A section: Heavy reverb (Air Studios Reverb), delay (EP‑34), and modulation.
    • B section: More aggressive processing – low part used the “Saggy Bridge” preset on UA’s Woodrow 55 amp sim.
    • EP‑34 delay: Modified version of the “Too Big Without You” preset.
    • Logic’s Tremolo: Used on the high part in the B section – 1/4 note rate, depth of 100%, giving a lot of movement and motion.
  • Panning: Wide stereo spread for texture.
  • Mix Bus processing: Black Box (“16 Mix Bus 1” preset), SSL G Bus Compressor (modified Default setting), Fairchild 670 (Modified “Stereo Bus” preset), LA‑3A (“Mix Bus Comp -1dB GR” preset), ATR‑102 (“Classic 250 Smooth Master” setting).

Special Mastering Notes

  • Target LUFS: -16 @ peak
  • Ozone settings:
    • Vintage Tape: “Clear Character” preset
    • Equalizer: Slight boost of +0.8 dB @ 11.227 kHz (Shelf)
    • Imager: 0‑199Hz = 0.0, 199Hz‑3.8kHz = 16.5, 3.8kHz‑11.6kHz = 31.6, 11.6kHz‑20kHz = 39.2
    • Vintage Compressor: “Smooth Opto” preset – threshold -19.9 dB, ratio 1.7:1, attack 30.1ms, release 97.0ms
    • Maximizer: IRC IV “Modern”, threshold -6.7 dB, ceiling -6.0 dB, Character 2.60
  • Dither: POW‑r #2 when converting from 24‑bit to 16‑bit.

Here’s the score for X9:

Identity is now available on all streaming platforms (such as Spotify), or you can also listen to it on Bandcamp.

Freedom

Motown funk, Joe Dart, and a whole lot of bass

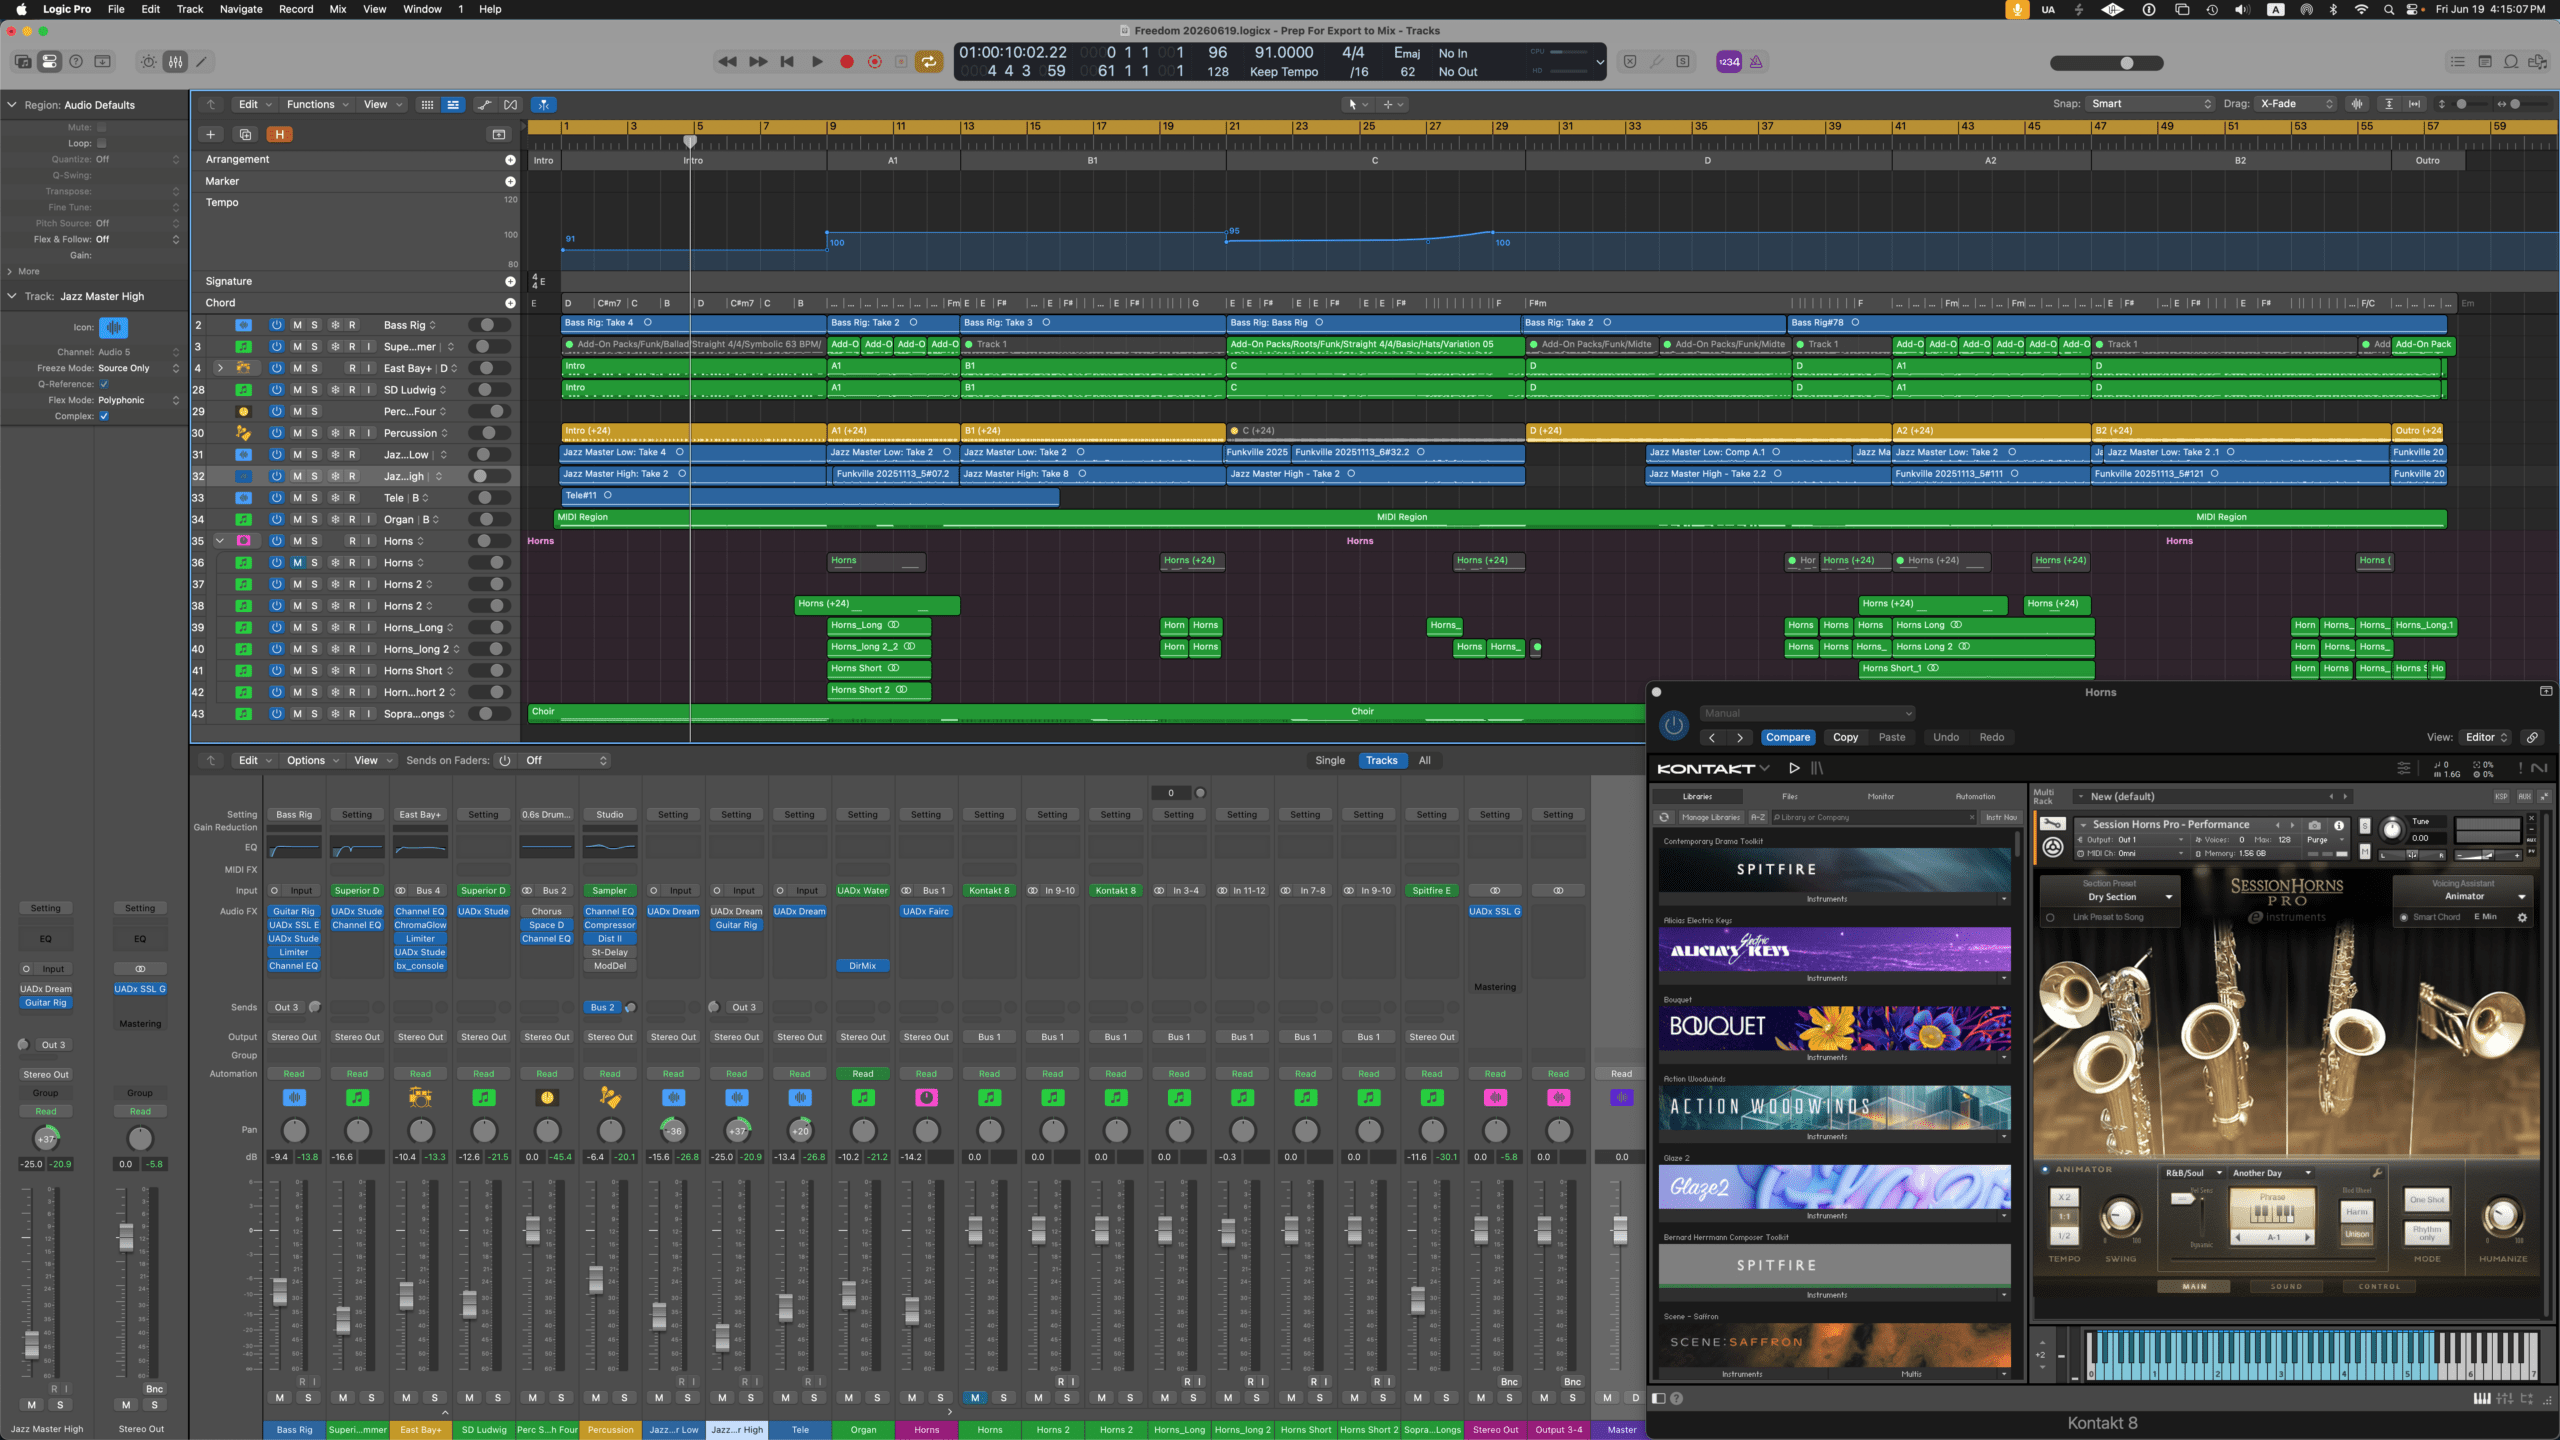
“Freedom” started as a love letter to the electric bass, specifically funk bass. I had been listening to Joe Dart’s playing on Vulfpeck’s “Dean Town” and loved the idea of having a through‑composed bass line on one of my songs. I wanted to capture the energy of “Dean Town” and the groove of classic Motown, but make it my own.

The working title was “Funkville” for a long time (a nod to Vulfpeck’s “Dean Town”, which was a nod to Weather Report’s “Teen Town”), but eventually it became “Freedom” – a name that felt right for a song about letting go and finding joy in the music.

This song was written completely from the bass part. I first came up with the bass line for the entire song and then figured out the harmonies and rhythms to use afterwards.

On the album, “Freedom” is the first track where the protagonist finds a sense of release. After the searching and moving of “I‑40”, this is the moment of surrender – not to anything in particular, but to the pure, unfiltered joy of rhythm and groove.


Special Recording Notes

  • Bass: My trusty Ibanez SR 400.
  • Guitar: My Fatfingers Jazzmaster, “The Duke”.
  • Drums: A Logic Drummer track blended with 2 Superior Drummer tracks.
  • Percussion: Logic’s Stereo Sampler, using the “Studio Percussion” preset.
  • Organ: UA’s Waterfall B3.
  • Horns: Session Horns Pro (had to watch Groove3 to get up to speed working with this one).
  • Backing Vocals: Mervyn Warren Choir.
  • Recording Challenges: The biggest challenge of this song (after I could play the entire piece in one pass without my hands cramping up) was getting the right tempo changes, so that it felt smooth and natural.

Special Mix Prep Notes

  • Clip gain: Adjusted as needed to get the tracks hitting the emulated processors at the ideal input levels (e.g., -18dB RMS).
  • Editing: Focused on tightening rhythmic parts so that everything gelled and felt like “one groove”.

Special Mixing Notes

  • Processing:
    • Logic Drummer: Brainworx SSL 4000E; Parallel Compression bus with LA‑2A Silver Compressor (“Drum Room Crush” preset); Parallel distortion bus with Black Box (“08 Black Wow” preset)
    • Superior Drummer (Ludwig Kit): Fairchild 670 (“More Room For Loud Drums”)
    • Percussion: Black Box (“05 Acoustic Sparkle”)
    • Bass: Brainworx SSL 9000J; dbx 160; Parallel Compression bus with UA A‑Type Multiband Enhancer (“Bass FAT‑22” preset) and Brainworx SSL 9000J (boost of 2.4dB @ 760Hz to get it to poke through the mix)
    • All tracks: iZotope’s Vinyl on intro to help give that “vintage” vibe
    • All Group Masters: Black Box
  • Mix Bus processing: Black Box (“17 Mix Bus 1” preset), SSL G Bus Compressor (modified Default setting), Fairchild 670 (Modified “Stereo Bus” preset), ATR‑102 (“Classic 250 Smooth Master” setting), plus a Pultec EQP‑1A boosting 2dB @ 100Hz and 1.25dB @ 10kHz.

Special Mastering Notes

  • Target LUFS: -15 @ peak
  • Ozone settings:
    • Vintage Tape: “Clear Character” preset
    • Equalizer: Slight boost of +0.9 dB @ 12.198 kHz (shelf)
    • Imager: 0‑182Hz = 0.0, 182Hz‑2.4kHz = 11.4, 2.4kHz‑12kHz = 29.1, 12kHz‑20kHz = 32.9
    • Vintage Compressor: “Smooth Opto” preset – threshold -18.6 dB, ratio 1.5:1, attack 28.6ms, release 46.9ms
    • Maximizer: IRC IV “Modern”, threshold -6.3 dB, ceiling -4.0 dB, Character 2.60
  • Dither: POW‑r #2 when converting from 24‑bit to 16‑bit.

Identity is now available on all streaming platforms (such as Spotify), or you can also listen to it on Bandcamp.

I-40

Open, forward-moving, and full of quiet certainty

The fifth song on Identity is “I-40.” This track gives me a feeling of possibilities. That specific moment when uncertainty starts to lift, and knowing takes its place; knowing that something good can come from all of the difficulty. It’s the shift from hoping things will get better to quietly sensing they can. I wanted the music to capture that growing optimism, forward-moving momentum.

The song came together from voice memos I recorded while experimenting with Open G on my Yamaha acoustic guitar in mid 2025. As it started to take shape, it kept reminding me of that stretch of I-40 between Nashville and Memphis. The song starts out feeling folksy, almost country, and ends up sounding very bluesy and heavy.

“I-40” finds the protagonist in a transformative place on the album’s journey. After the introspection and heavy realizations of earlier tracks, this one is about the quiet thrill of alignment. Things are starting to move in the right direction. The doubts are still there in the periphery, but they’re fading against a growing confidence that better days aren’t just a wish anymore—they’re a destination that will soon be reached. It’s hope graduating into knowing.


Special Recording Notes

  • Tuning: Open G (D–G–D–G–B–D). This was new to me, and I loved how it led me to new ideas for melodies and chord voicings.
  • Guitars (all acoustic):
    • Yamaha – FG730S 
    • Taylor aka “Zeus” (this guitar is godly, hence the name)
    • Baby Taylor in “Nashville tuning”  (high‑strung, octave‑up strings, tuned to Open G) creating a chiming texture that floats above the mix.
  • Microphone setup: Multi‑mic setup, similar to what I used on “Us,” across all three guitars.
    • Equitec 100 for close mic’ing around the 12th fret. 
    • Matched pair of Earthworks for the room mics, to get depth and breadth.
  • Could have done better: Should have recorded the primary track (the Yamaha) to a click. I love the final version, but it was a lot of work getting everything to lock up and gel. 

Special Mixing Notes

As with “Fields,” I exported everything from Logic as individual audio tracks and brought them into Luna for the final mix. 

Here’s what I used to process each of the tracks:

  • Studer A800 (“Hi-Fi 30IPS GP9 +6 Ext”) 
  • Brainworx SSL 9000J (for tonal and eq treatment) 
  • Fairchild 670 for parallel compression (modified Default setting)
  • LA-3A on each group submaster (“Acoustic Guitar” preset)
  • UA’s Oceanway Studios in reverb mode (modified “Reverb B Guitar” preset) for each group

Here’s what I used on the mix bus:

  • Black Box (“17 Mix Bus 1” preset)
  • SSL G Bus Compressor (modified Default setting)
  • Fairchild 670 (Modified “Stereo Bus” preset)
  • LA-3A (“Mix Bus Comp -1dB GR” preset)
  • ATR-102 (modified “Default” setting)

Special Mastering Notes

  • Target LUFS: -16
  • Ozone settings:
    • Vintage Tape: “Clear Character” preset
    • Equalizer: +0.9 dB @ 12.198 kHz (Shelf, Q 24.0)
    • Imager: 0‑70Hz = 0.0, 70Hz‑3.1kHz = 16.5, 1.5kHz‑11.5kHz = 26.6, 11.5kHz‑20kHz = 36.7
    • Vintage Compressor: “Smooth Opto” preset – threshold -22.6, ratio 1.6:1, attack 28.6ms, release 95.2ms
    • Maximizer: IRC IV “Modern”, threshold -6.5 dB, ceiling -3.5 dB, Character 2.60
  • Dither: POW‑r #2 when converting from 24‑bit to 16‑bit.

Identity is now available on all streaming platforms (such as Spotify), or you can also listen to it on Bandcamp.

Fields

Languid, stretched out, and full of reverb

The fourth song on the Identity album is “Fields”. I wanted it to feel desolate and lonely, yet hopeful and a yearning for connection. I wanted it to be hauntingly beautiful, full of rich tremolo and reverb, with chords that feel like they’re radiating in all directions. I had been listening to Ry Cooder’s Paris, Texas soundtrack, Lyle Lovett, and Jedd Hughes – that lonesome Texas guitar feeling – and I wanted to capture some of that for myself.

The song came together from voice memos I recorded in May 2025. I kept it stretched out and languid, letting the phrases breathe. The working title was “Texas Guitar” for a long time, but eventually it became “Fields” – a name that felt open and wide, like the music itself.

“Fields” extends the emotional journey of the album. The protagonist is looking outward, searching for connection across a vast horizon. The realizations and resulting disappointments of “The Gospel” have left them feeling somewhat lost, but as the song builds, hope of something better begins to return.


Special Recording Notes

  • Guitar: Fender Jazzmaster (“The Duke”).
  • Amps: Fender Tone Master and Fender Hot Rod Deluxe Inspired by Michael Landau.
  • Microphone setup:
    • SM57 close‑mic’ing the Landau amp.
    • Equitec 100 close‑mic’ing the Tone Master.
    • Earthworks stereo pair as room mics.
  • Signal chain: Guitar DI in Logic Pro → Apogee Quartet → Radial JCR ReAmp → UA Max pedal → Radial BigShot ABY pedal → both amplifiers simultaneously.
  • Additional Re‑amping: Recorded DI, then re‑amped through the above setup. Later, I used the re‑amper again to run through a Strymon BigSky for ethereal shimmer processing, which I recorded onto other tracks.
  • Additional instruments: Synth bass for super low subs during dynamic builds.

Although “Fields” is essentially a solo electric guitar song, it’s a big session for just one guitar. There are five tracks of the same guitar part: one DI track running through UA’s “Dream” amp sim, a re‑amping of that DI signal through a couple of tube amps that were close‑mic’d, and two stereo room mics capturing the blend of those amps. On top of that, there is a ton of reverb (Lexicon 224, Lexicon 480, Capitol Chamber, Air Studios Reverb Essentials) and delay (EP‑34) helping to give depth and breadth to the sound.

I did another couple of tracks of re-amping my original DI signal. This time I ran it into a BlueSky pedal to get an ethereal wash via the shimmer sound it is so well known for. Here is a clip of just the BlueSky “shimmer” Tracks:

Another texture I added was a wash of delay courtesy of the EP-34. It added a sense of space and motion without taking up too much sonic real estate. Here’s an audio clip of the EP-34 wash:

Here is a “before & after” comparison. The first clip has none of the extra processing in it. Just the original guitar and synth bass tracks. The second has all the additional effects included (multiple reverbs, BlueSky shimmer tracks, EP-34 delay wash).

Before: “Fields No FX Processing.mp3”

After: “Fields All Processing.mp3”


Special Mixing Notes

Normally I don’t use much FX processing from a Logic file in the way of reverbs and delays – I usually start fresh once I get everything into Luna. This time was different – I loved the sounds I got in the rough mix and just exported everything out as individual audio tracks, the instrument tracks as well as the FX sends. This made for a pretty simple and quick mix in Luna once I got levels matched. From there it was mainly a matter of overall volume adjustments and automation, tape settings and saturation levels for each track, and mix bus processing. Here’s what I used on the mix bus:

  • Black Box (“16 Mix Bus 1” preset)
  • SSL G Bus Compressor (modified Default setting)
  • Fairchild 670 (Modified “Stereo Bus” preset)
  • LA-3A (“Mix Bus Comp -1dB GR” preset)
  • ATR-102 (modified “Classic 250 Smooth Master” setting)

Special Mastering Notes

  • Target LUFS: -14.5
  • Ozone settings:
    • Vintage Tape: “Clear Character” preset
    • Equalizer: +0.9 dB @ 13.816 kHz (Shelf, Q 24.0)
    • Imager: 0‑100Hz = 0.0, 100‑1.5kHz = 16.5, 1.5kHz‑11.5kHz = 26.6, 11.5kHz‑20kHz = 36.7
    • Vintage Compressor: “Smooth Opto” preset – threshold -22.6, ratio 1.6:1, attack 28.6ms, release 95.2ms
    • Maximizer: IRC IV “Modern”, threshold -8.3 dB, ceiling -4.8 dB, Character 2.60
  • Dither: POW‑r #2 when converting from 24‑bit to 16‑bit.

Identity is now available on all streaming platforms (such as Spotify), or you can also listen to it on Bandcamp.

Us

Open D, Zeus, and a song about family

“Us” started with a tuning I had never used before: Open D (DADF#AD). I’ve written songs in alternate tunings previously, but never in Open D. The moment I strummed that first chord on my Taylor “Zeus”, I knew there was a song in there waiting for me to discover. It felt deeply resonant, wide, and somehow nostalgic. The song came together over a few days of songwriting rotations.

The song’s melody and movements reminded me of my family, all the fun and magical moments we have shared over the years. It feels warm and expansive with a sense of adventure to me.

For the album’s narrative, this song builds on the nostalgia of “Angel” – remembering what was good in one’s life and wanting that to last as long as possible.

I rehearsed the song daily and performed it at multiple CST sessions. By the time I was ready to record, I knew the song inside out – but that didn’t make the recording process any easier (see Special Recording Notes).


Special Recording Notes

  • Guitar: Taylor “Zeus”, tuned to Open D (DADF#AD).
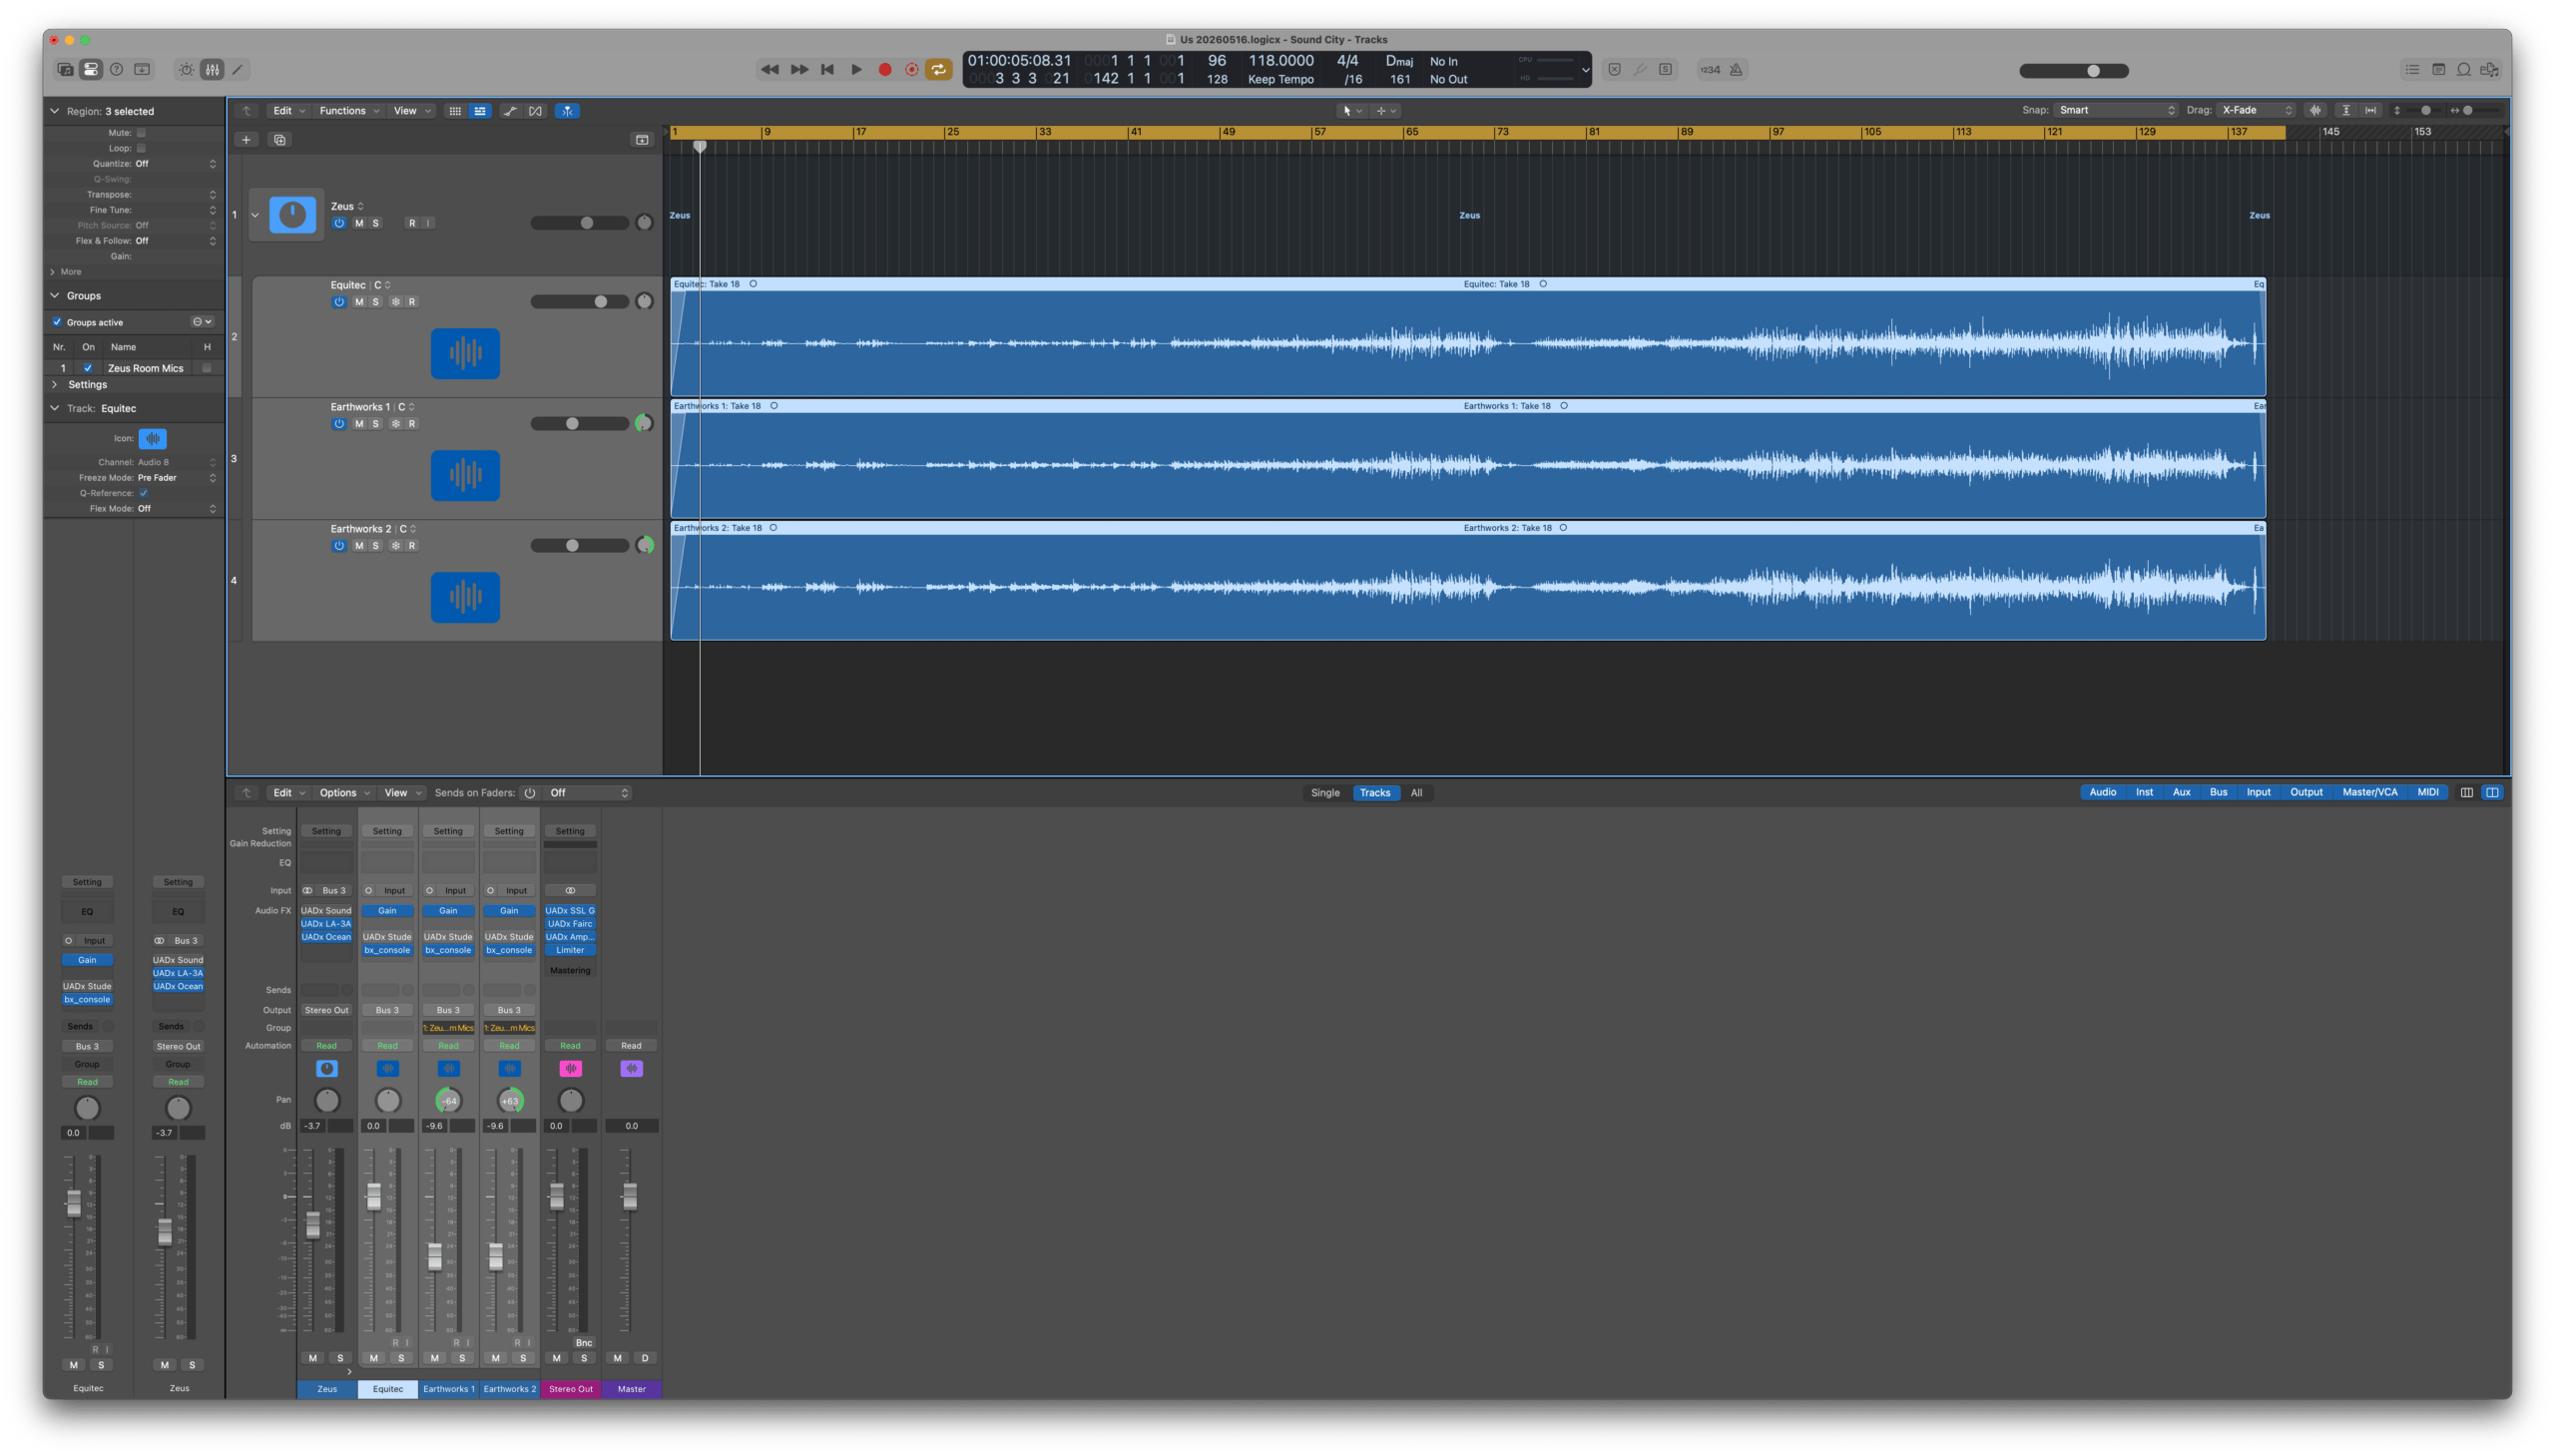
  • Microphone setup: Multi‑mic technique – one Equitec mic at the 12th fret, plus two Earthworks microphones in stereo a few feet away and slightly above. This gave me flexibility in mixing to balance string articulation and room tones. I was pleasantly surprised by the depth this approach afforded me.
  • Recording environment: Outside noise (delivery trucks, helicopters, planes) ruined many takes. I learned to record during quiet late‑night hours.
  • Keeper take: Take 18 was the one. It felt solid from start to finish. I marked it immediately.

Special Mix Prep Notes (Post‑Tracking, Pre‑Mixing)

  • After some clip gain adjustments (shooting for -18dB RMS), I exported all the files out of Logic and brought them into Luna for mixing.

Special Mixing Notes

  • Submasters: Created a group sub‑master for the guitar tracks.
  • Brainworx SSL 9000 J: Used on each of the guitar channels for tone shaping.
  • Fairchild 670: Used on a send with modified settings (adjusted Input and Threshold from the default) for parallel compression.
  • LA‑3A: On the group sub‑master using the “Acoustic Guitar” preset. (Got this idea from a Bob Clearmountain video.)
  • Ocean Way Studios: Used in reverb mode on a send.
  • Capitol Chambers: Used with a modified version of the “Acoustic Guitar Chamber 6” preset.
  • Mix Bus processing: Black Box (“17 Mix Bus 1” preset), SSL G Bus Compressor (modified Default setting), Fairchild 670 (Modified Stereo Bus preset), ATR-102 (modified Default setting)

Special Mastering Notes

  • Target LUFS: Aimed for approximately -16 LUFS (preserving the wide dynamic range – very soft to triple forte).
  • Ozone settings:
    • Vintage Tape: “Clean Fifteen” preset
    • Equalizer: -1.2 dB @ 239 Hz (Bell, Q 8.9), +0.6 dB @ 10.7 kHz (Shelf, Q 24.0)
    • Imager: 0‑70Hz = 0.0, 70‑2.7kHz = 24.1, 2.7kHz‑11.8kHz = 32.9, 11.8kHz‑20kHz = 41.8
    • Vintage Compressor: “Smooth Opto” preset – threshold -22.6, ratio 1.5:1, attack 37.8ms, release 69.6ms
    • Maximizer: IRC IV “Modern”, threshold -7.2 dB, ceiling -4.3 dB, Character 2.60
  • Dither: POW‑r #2 when converting from 24‑bit to 16‑bit.

Identity is now available on all streaming platforms (such as Spotify), or you can also listen to it on Bandcamp.

Fly on the Wall (Film)

My wife, Rachel, found this fantastic video of a live orchestral film scoring session on YouTube. It’s a 2.5 hour film done @ Air Studios in London, England. Very inspiring to see how things are done at this level of professionalism, expertise and excellence.

Thanks to Christian Henson and Spitfire audio for making this available for all of us to see. Very cool, indeed!

Is This Thing Live?

I had been wanting to get more familiar with Ableton Live for quite a while and the 2019 Spring Concert was the perfect opportunity to do just that. While I love Logic Pro X for writing and production, I was intrigued by the idea of the scene based approach Live has for performance and wanted to see what I could do with it. 

Fortunately I found this excellent tutorial on Groove3: https://www.groove3.com/tutorials/Ableton-Live-10-Explained. It got me up to speed really quickly and before I knew it I was putting together the entire concert in Live.

I found Live to be a pretty straight forward (but deep) and well thought out application. It’s feels “fluid” in it’s workflow and very robust. I am looking forward to using it more in the future, particularly for coordinating music with visuals. Thanks Ableton!  

Take Away(s)

There were a number of things that I took away from the 2019 Spring Concert, but perhaps the biggest thing I learned was the importance of rehearsing with the full system set up for more than one day. I think the ideal amount of time would have been about a week.

I did rehearse every day over the last month and a half, but always sitting down, without microphones/PA and playing at lower volume levels. Also, it wasn’t until the day before the concert that I had Ableton Live completely configured (audio files, MIDI mappings, sound patches, virtual instruments, etc). Up until then I was practicing with Logic Pro X – the app that I did all the production in.

Other things that I learned:

  • Really need to use chains in Live to switch between virtual instruments as selecting the desired track via MIDI mapping for MIDI controller focus wasn’t always reliable.
  • Use audio stems instead of “minus 1” tracks next time. Would be nice to have more isolation of tracks in the future (particularly synth basses and drums).
  • Should coordinate visuals better. This time was more like a proof of concept. Going forward I’d like to have them tailored to each song in Final Cut Pro and then triggered in Live, which could take a considerable amount of time to do. Need to allot for that. Perhaps 2 weeks or more?
  • Would be great to have extra time with everything set up to get extra footage for song videos (e.g. multiple passes of each song during the rehearsals, close ups of the gear/lighting, abstract images, etc.)
  • Clip for one of mics I planned on using was missing. Ended up using a condenser mic with a mic pre, which sounded totally different.
  • Both mic stands kept drifting downward when positioned over the keyboard. Need to repair or replace them.
  • Performing with mic stand positions (especially when singing while playing keyboards) was awkward at times.
  • Disable notifications on my laptop!

Most importantly, having the extra time to rehearse will make it easier for me to get into the flow of the music.

Things that worked:

  • Practicing the songs regularly was a win for being prepared musically.
  • Using Ableton Live worked pretty much the way that I hoped it would.
  • The equipment set up and layout of the room was really good.
  • The contour of the concert provided a nice variety of styles.
  • Visuals added a lot of depth and dimension to the feeling of the space.
  • Using Guitar Rig for performance worked really well for maintaining balance of volume between instruments (vs using an external guitar amp).

Here’s a beautiful painting of the layout of the room that my wife made. I think it’s fantastic!